Adventure Photography: Olympus OM-D E-M1 Mirrorless Camera Long Term Review

Introduction

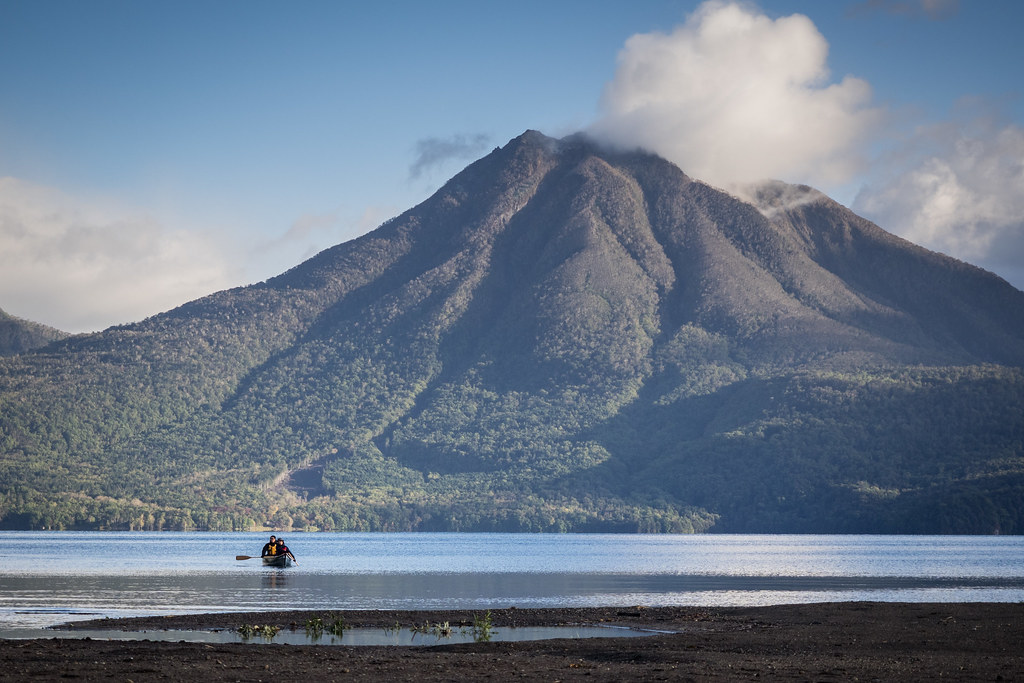
The vast majority of photos that I take are taken outdoors, during human-powered adventures. My style of photo in particular is one that captures humans in natural environments, engaged in some form of movement or activity in those natural environments. It might be dusty, cold, raining, or snowing. Regardless of the conditions, I really appreciate a device that allows me to capture crisp, clear images (and footage) of what it means to experience a human powered adventure.

There are plenty of cameras that would fit the bill. But I value one that is also light weight and compact. I’ve always admired the images produced by full frame DSLR cameras and their large, high quality lenses, but the prospect of having to lug the weight of such a system up a hill either on a bike or on my back does not particularly appeal.

Enter the mirrorless micro four-thirds camera system. Cameras that use this system have a sensor that is half the size of a full frame camera, and they don’t have an optical viewfinder that requires a bulky mirror system inside the camera body. The size of the sensor also dictates smaller lenses than their full frame counterparts. This means smaller camera bodies and smaller lenses.

Olympus OM-D E-M1 in snow (Hokkaido, Japan)

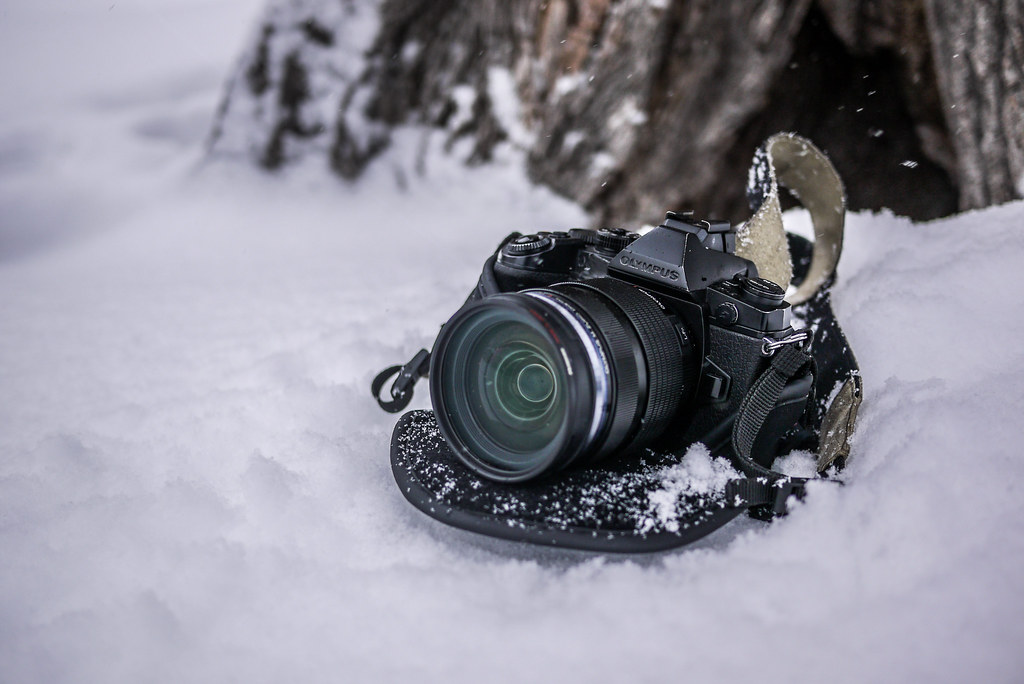
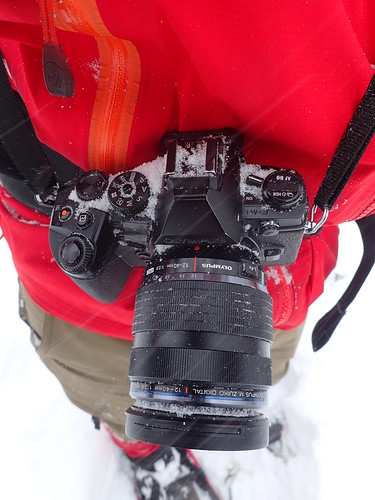
So almost two years ago, I jumped in the deep end and bought an Olympus OM-D E-M1 camera body (pictured above with the Olympus 12-40mm f2.8 lens). At the equivalent of around US$1,000 at the time, this was a big purchase. But I’d already spent the preceding few years using a second-hand, first-generation micro four-thirds camera, the Panasonic Lumix GF1. I loved the small size of the GF1, and liked the ability to use old cheap lenses on it with an adapter. But the lack of weather proofing made using the camera in all outdoor conditions difficult, and the only option for image stabilization was to use lenses with image stabilization. When using old manual lenses from the late 1990′s, it was difficult to get a crisp shot in low light.

The Olympus OM-D E-M1, with its weather resistant, shock resistant, freeze-proof (to an extent, see below) body, complete with in-body stabilization, was a very promising proposition. It has now been almost two years since I bought it, and here’s my long term thoughts about it, from the perspective of seeking a quality camera for adventure photography.

Skiing Mt. Yoichi near Sapporo, Hokkaido, Japan

Review – the good stuff

Basically, the camera is incredible. It is much more advanced than my current photography skills, and it does everything I want it to do, with clear, sharp images, and great dynamic range for a small-ish sensor. I have no major beefs with the image quality. So, I will start the review with several features that I really love about the camera, and end with some things that I wish the camera had.

Weather sealing

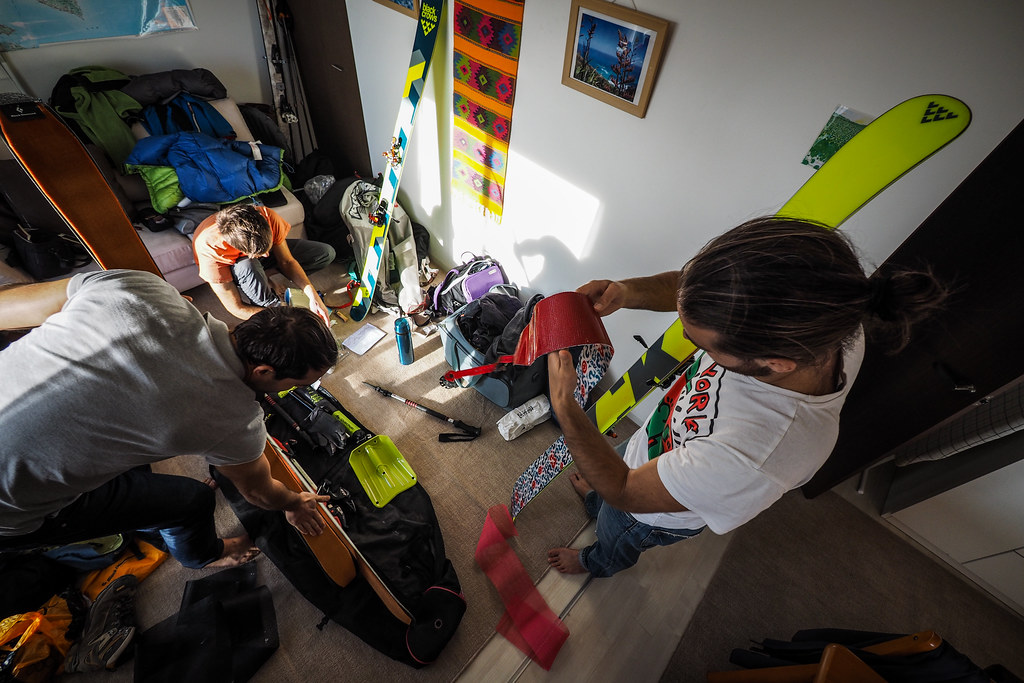
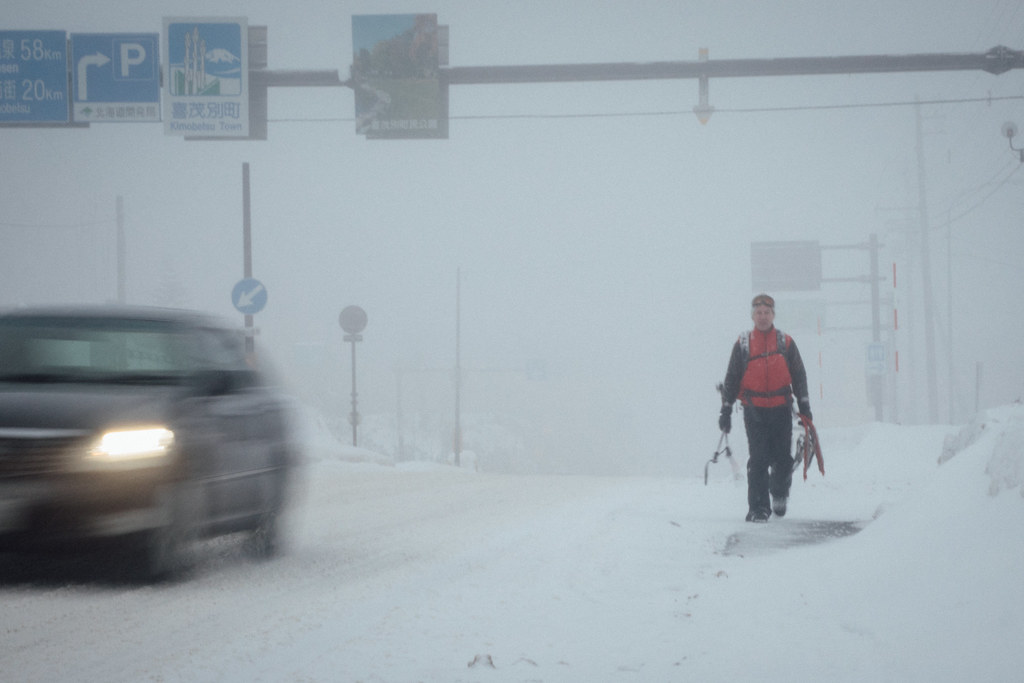
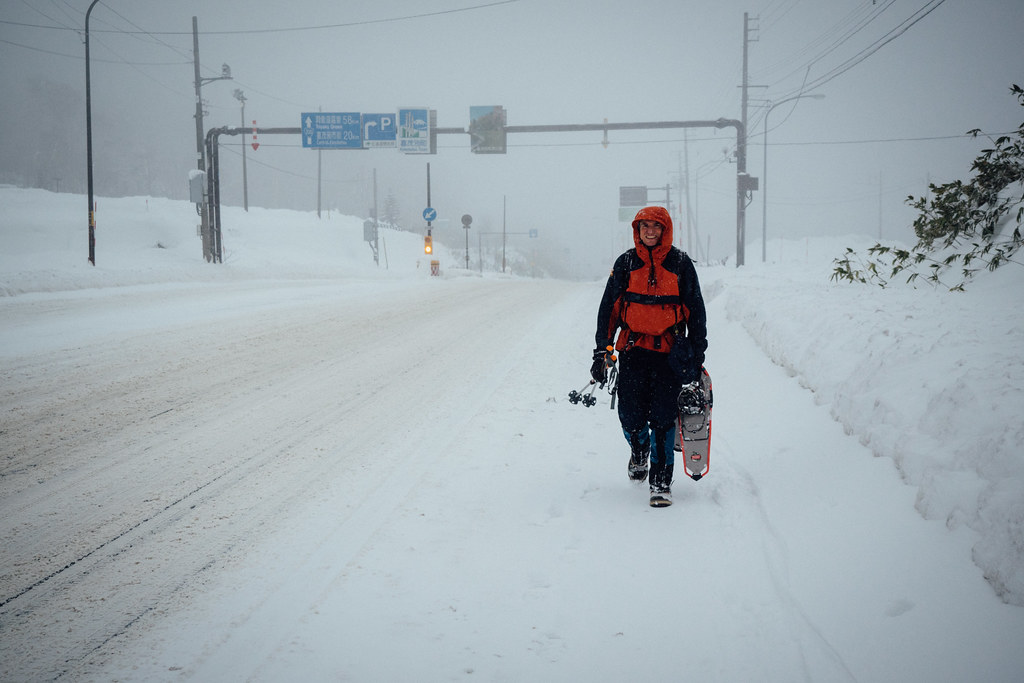
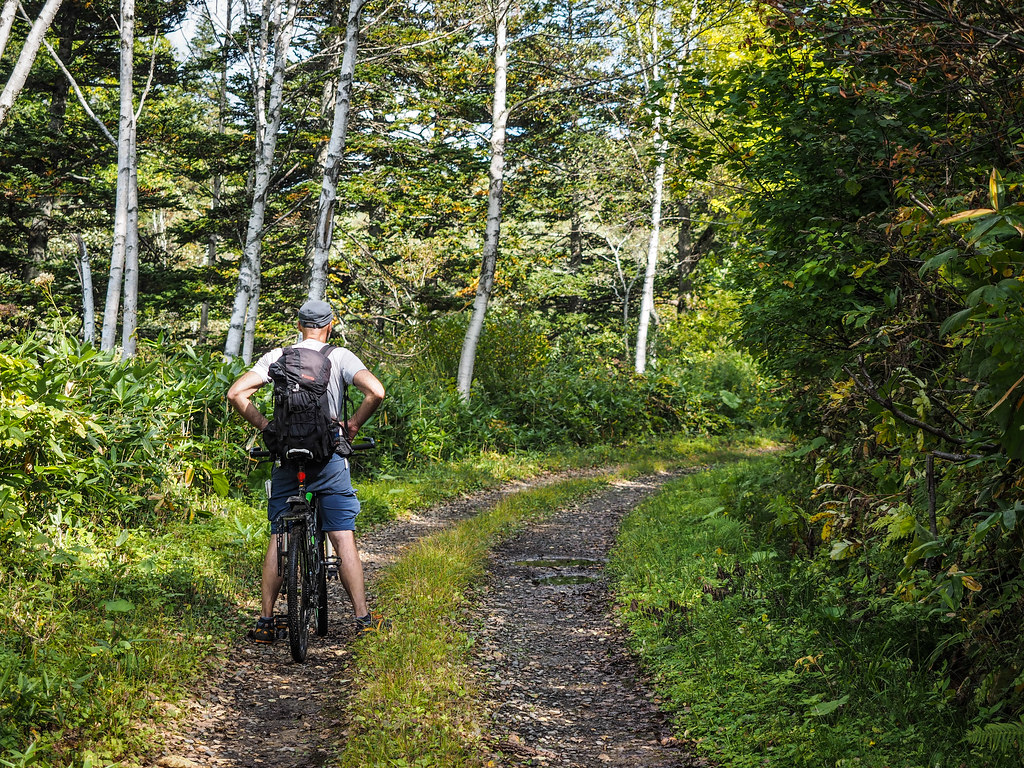
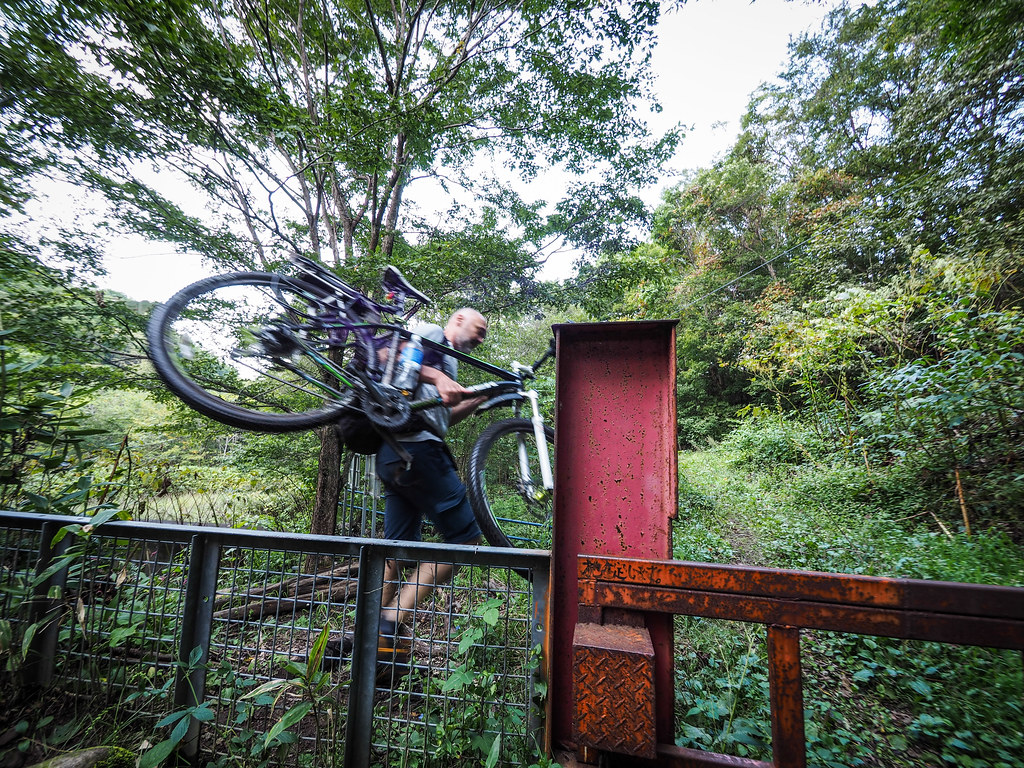
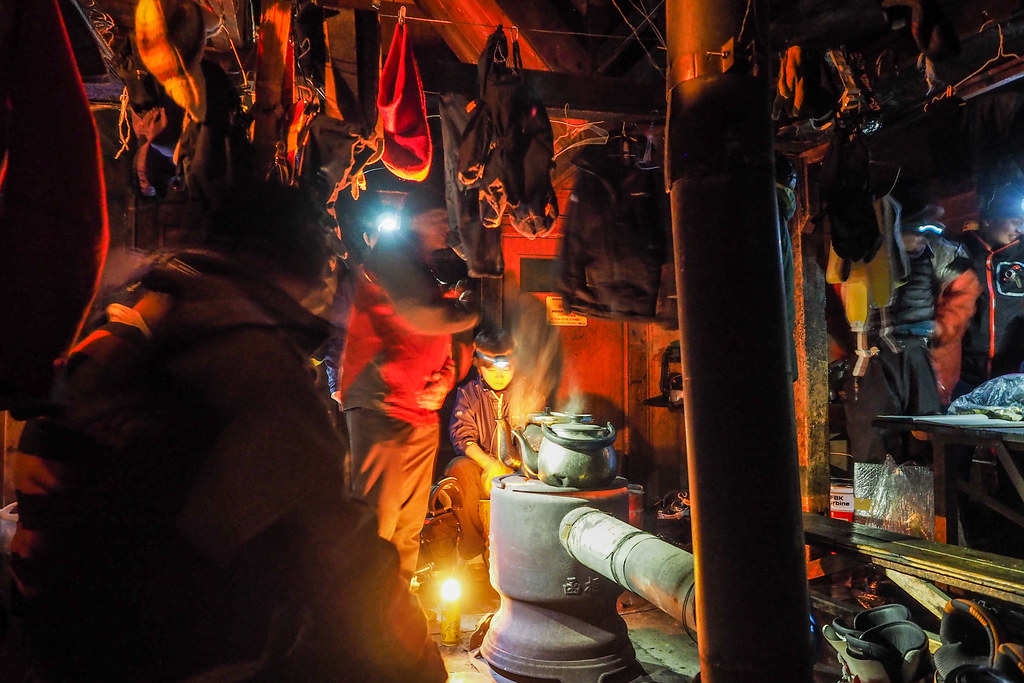
When I am outdoors with the camera, the majority of the time I have the camera slung over my shoulder using a shoulder strap. Until recently, I generally didn’t use any sort of cover for the camera. The rationale behind this is that I always want really quick access to the camera for capturing images of people as they move through landscapes and scenes. As much as possible, I don’t want to ask people to stop what they’re doing so that I can get a camera out of a bag and set up a shot. So far, the camera has held up to the abuse of being carried like this across dusty gravel roads on a bicycle, through rain showers, and in heavy snow.

Wheelshields - fenders/mudguards for your longboard

A moving bike selfie on the Chtiose Cycle path to Lake Shikotsu, Hokkaido, Japan    The Tern Verge S27h 20-inch wheeled folding bike on the Molesworth Muster Trail, New Zealand

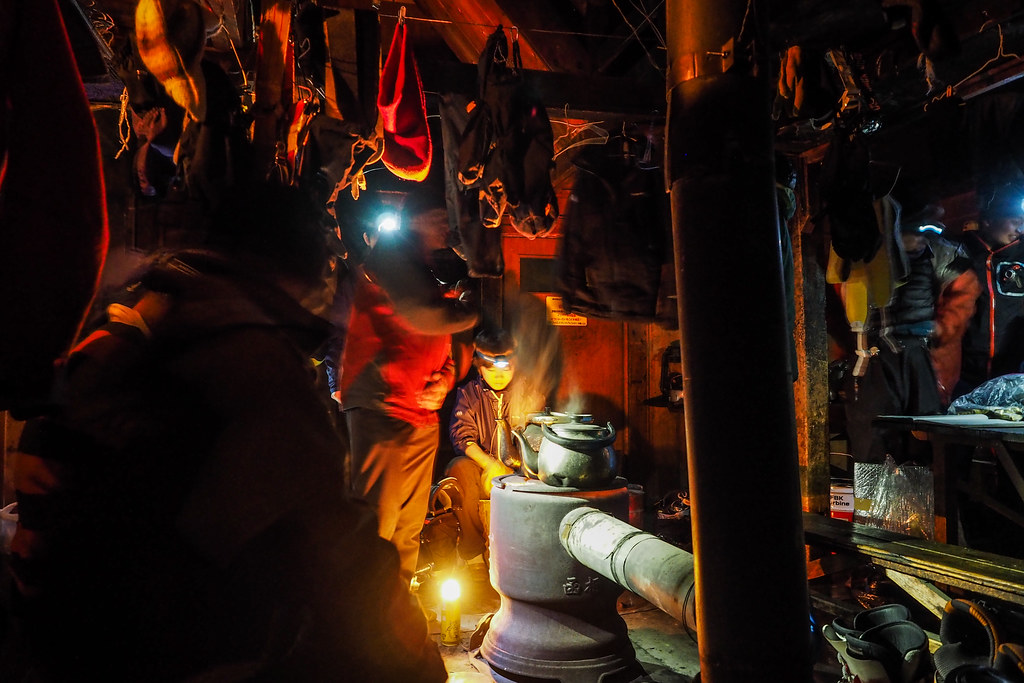
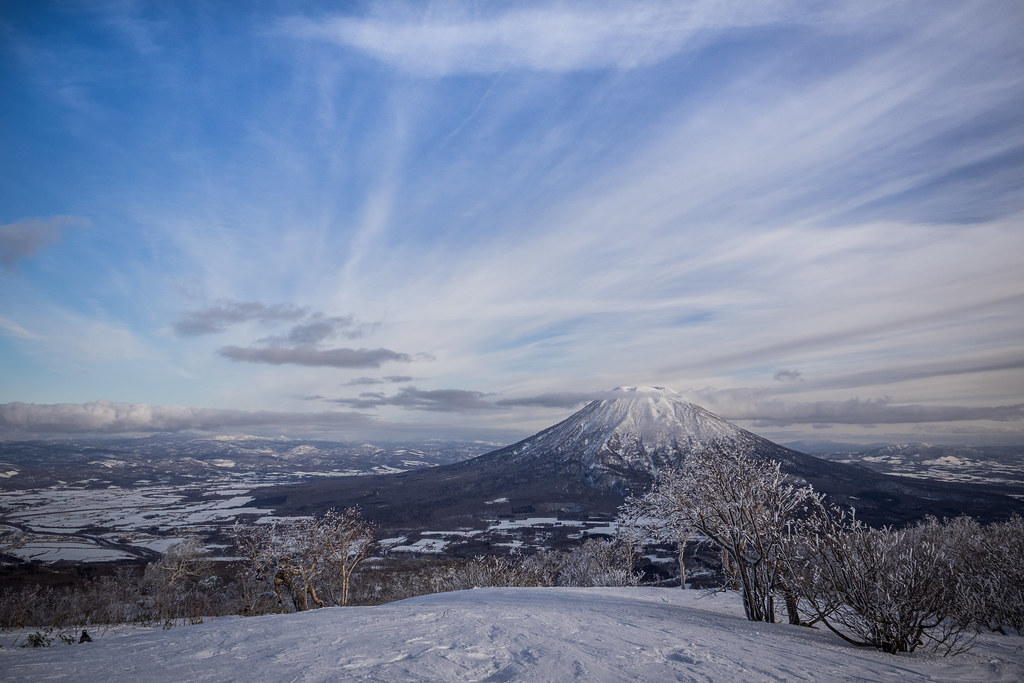
The Olympus OM-D E-M1 also boasts to be ‘freeze-proof’. Previous to moving to Hokkaido, the northern most island of Japan, I never really used a camera much in sub-zero temperatures (although it got pretty cold in eastern Turkey with my Canon G9 compact camera), so I don’t have anything to compare it to. But I can say that the camera does perform fine down to around -10 deg C, as advertised. Most of the timelapses below, filmed at the Sapporo Snow Festival in Hokkaido, Japan, were captured over periods of hours at a time, at below freezing, with no issues.

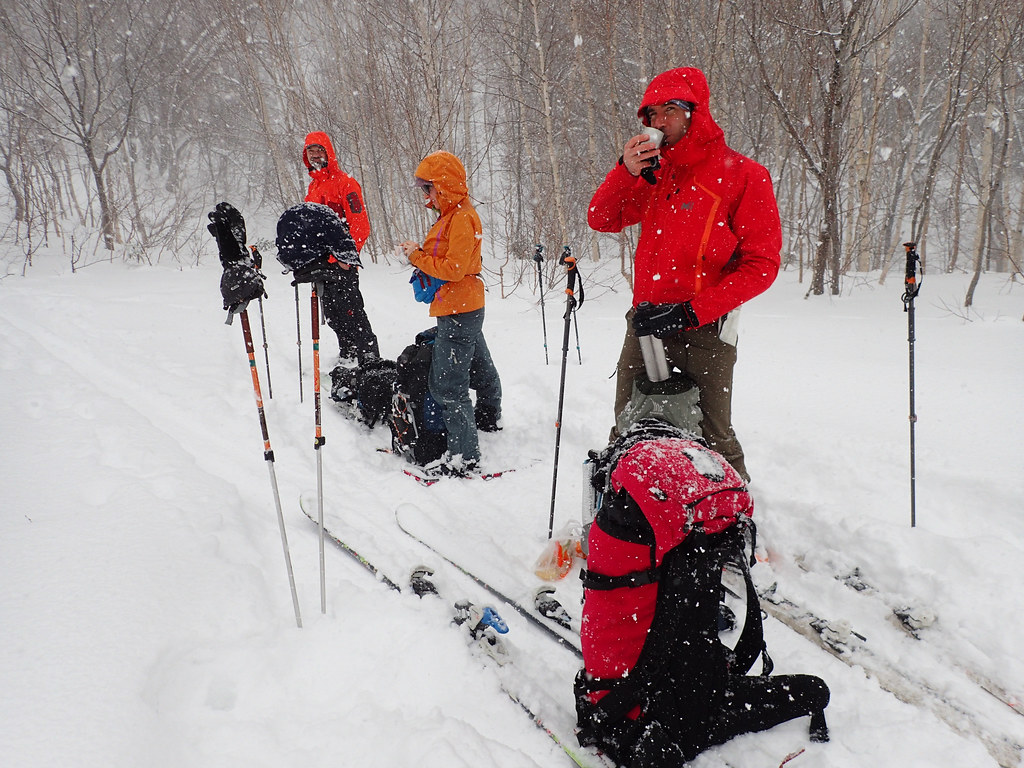
That said, I’ve experienced the shutter sticking closed on a number of occasions when using the camera on ski trips. Generally, conditions where the shutter seems to freeze shut are those where I’ve had the camera attached to me using a shoulder strap, the temperature is at or below -10 deg C, and the wind is howling. After half an hour or so of the camera being exposed to conditions like that, the mechanical shutter will stick, and only a couple of stiff blows to the camera will free it. The wind quickly sucks any warmth out of the metal body and lens.

Snowy Olympus OM-D E-M1 camera

I felt like this was a serious drawback of the camera, until 1) Olympus came out with Firmware Version 4.0 (which includes a full electronic shutter feature) and 2) that I had perhaps expected a little too much from the camera. I’ve since bought a neoprene soft case (the Hakuba PixGear SS cover) that still allows quick access and lets me carry the camera on a shoulder strap, but gives the camera much more protection from subzero winds. So far this extra protection seems to be helping to keep the shutter working.

Why not just use the electronic shutter all the time? The reason is that using the electronic shutter to capture moving subjects causes some distortion sometimes. This is called ‘rolling shutter’, like when you try to film outside a moving train’s window: vertical objects like power poles and trees appear as though they are bent. I don’t see nearly as much distortion on the OM-D E-M1′s electronic shutter, but when scrolling through consecutive images panning across a landscape, captured using the high speed continuous shot, you can see some distortion.

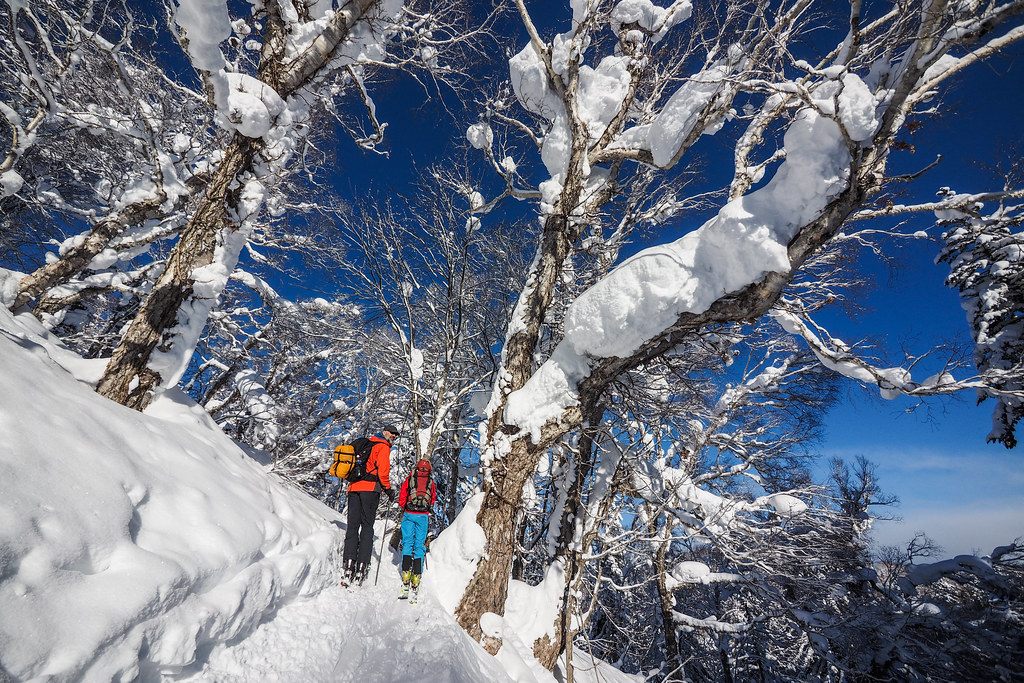
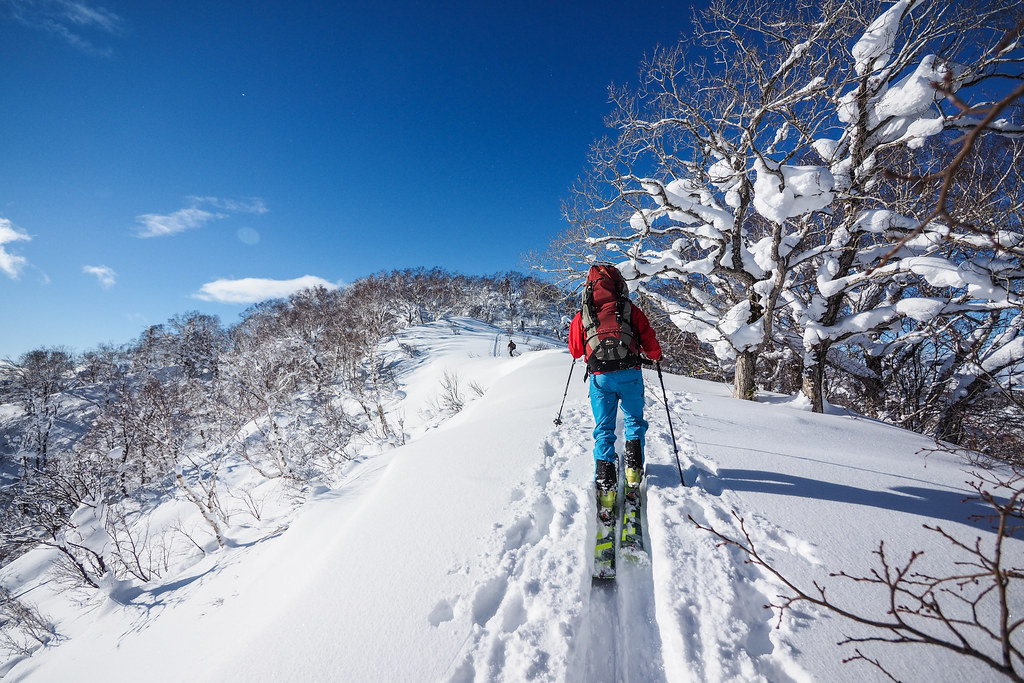
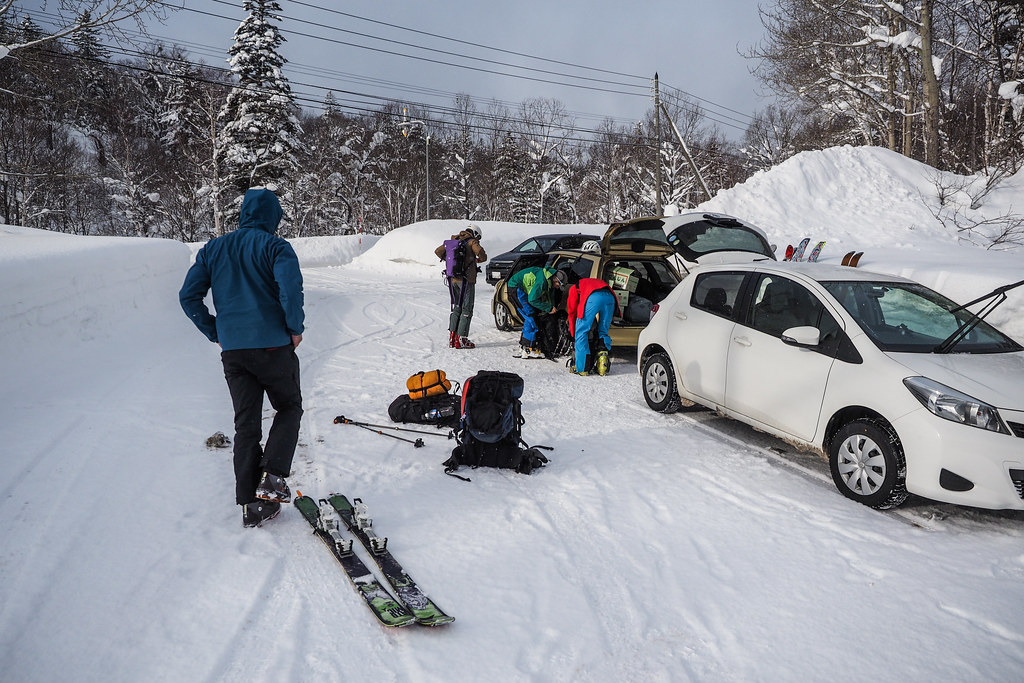
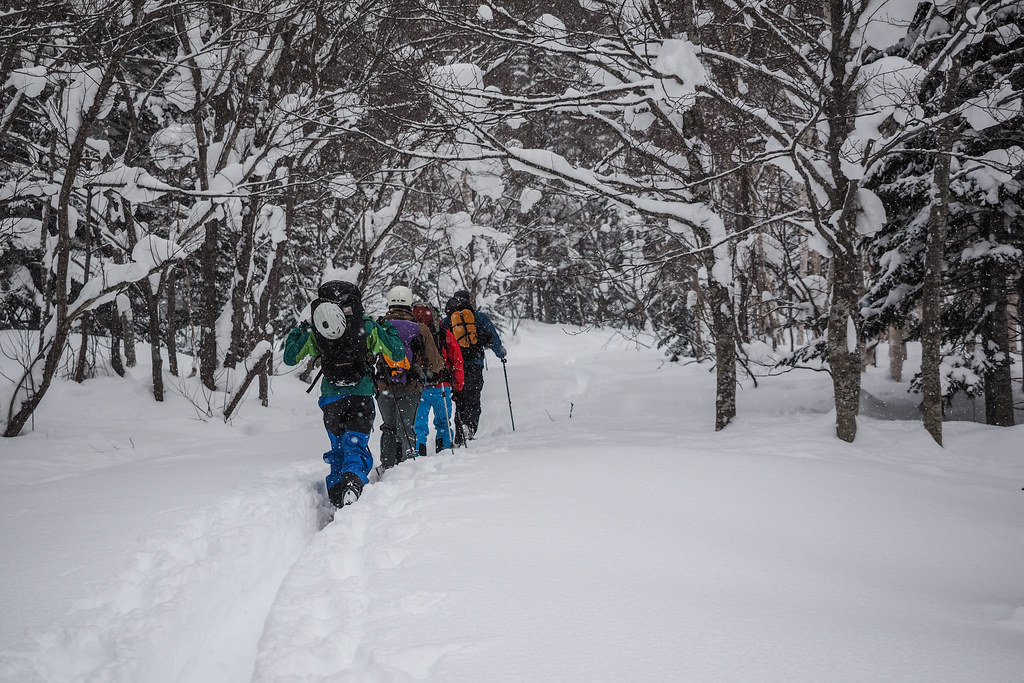
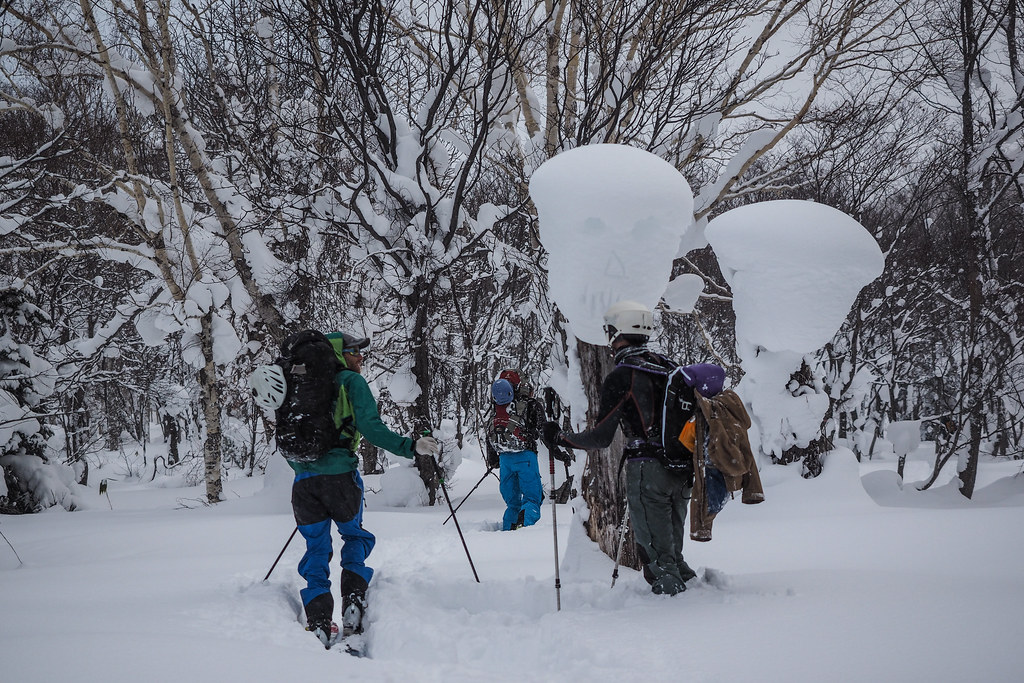
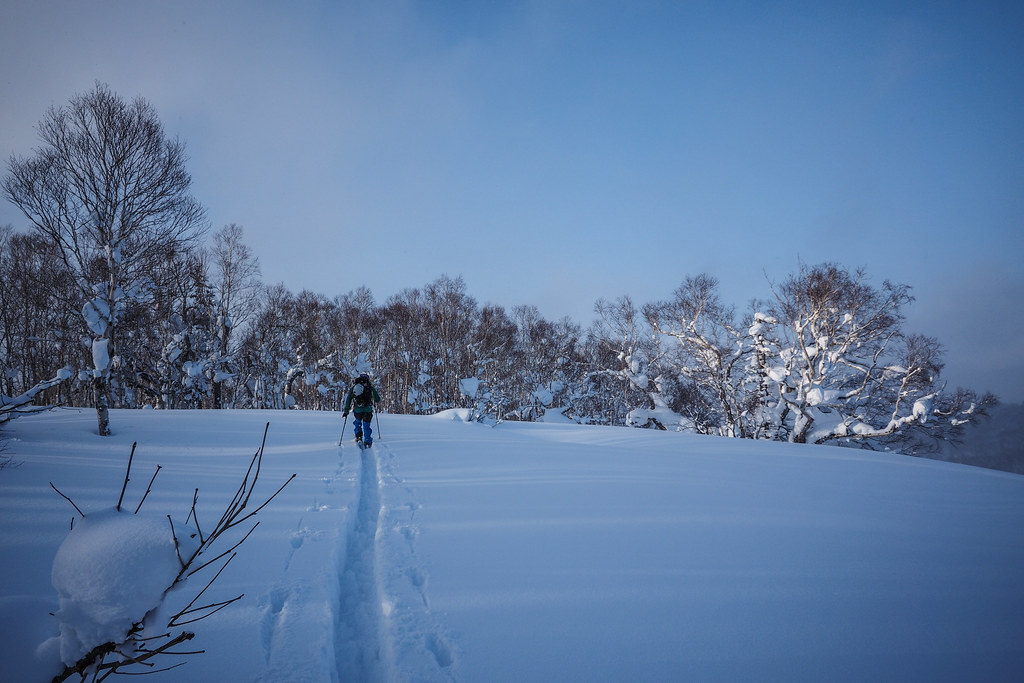
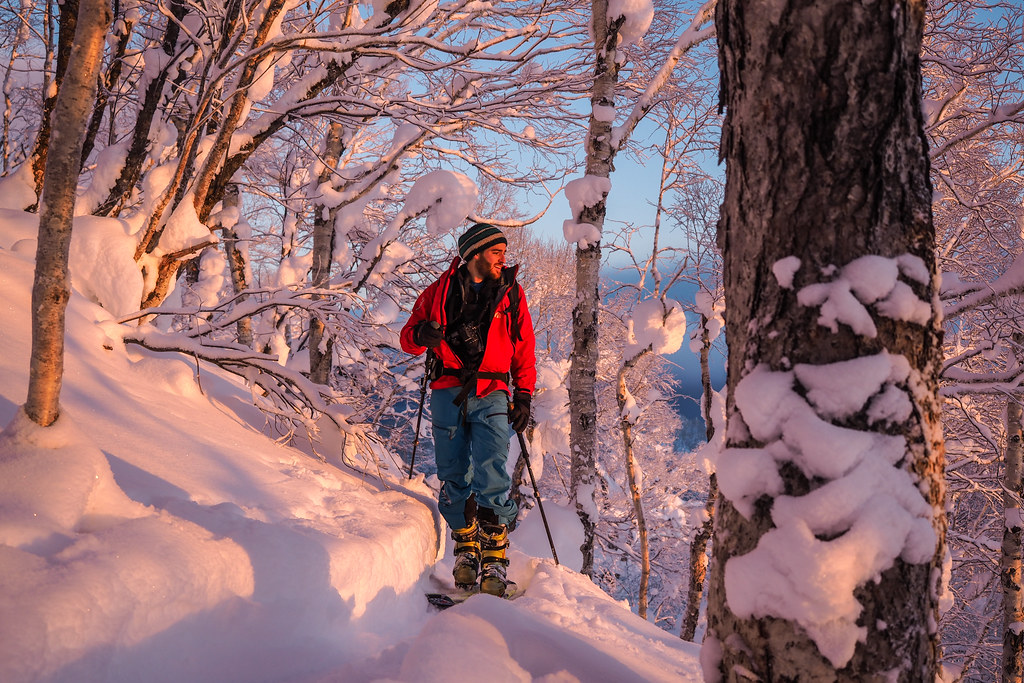
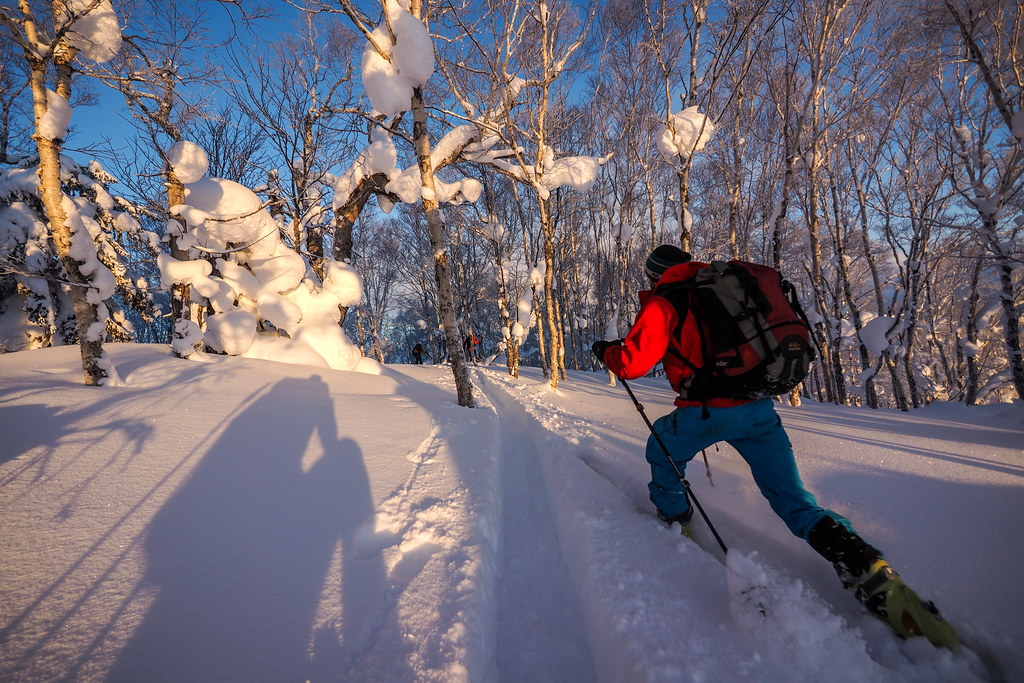
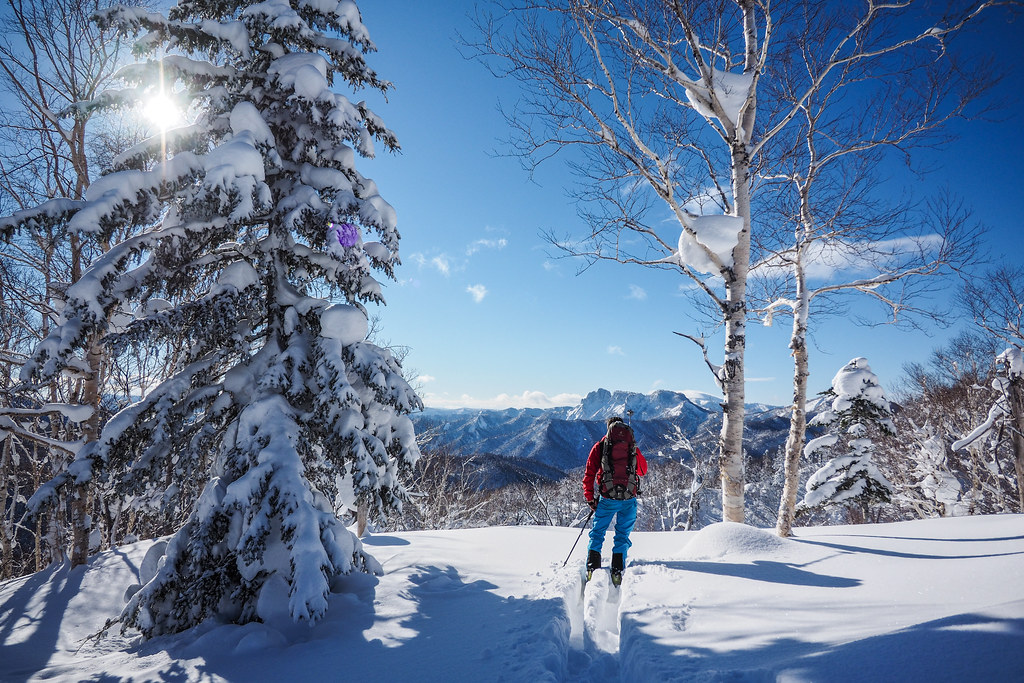
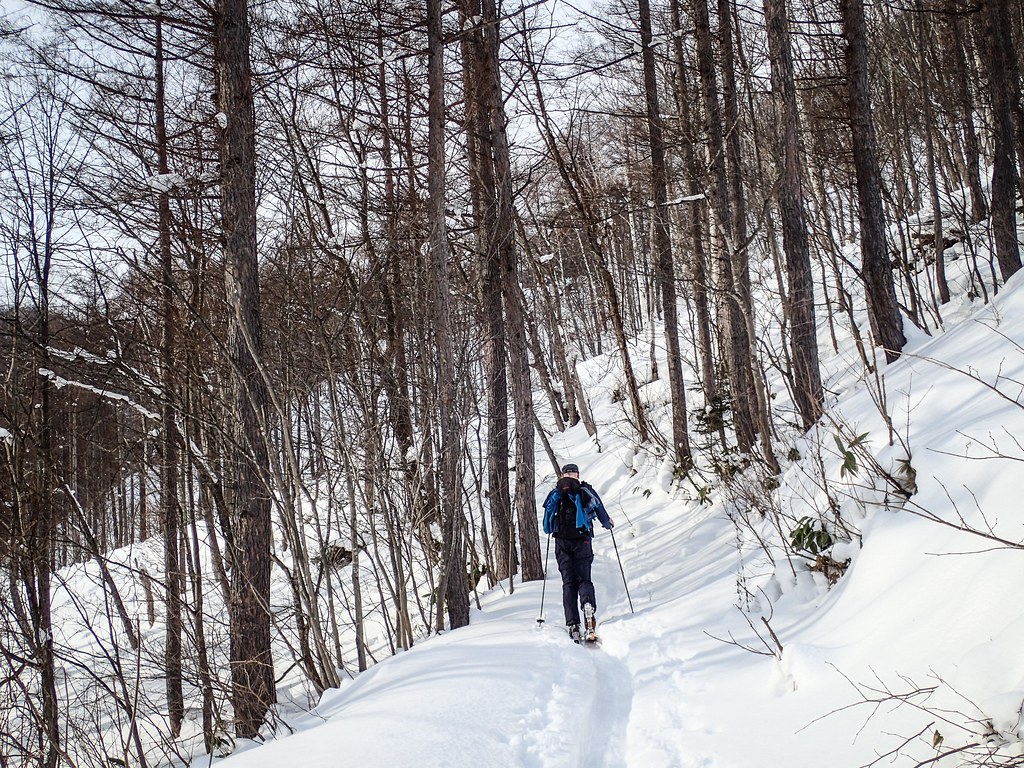
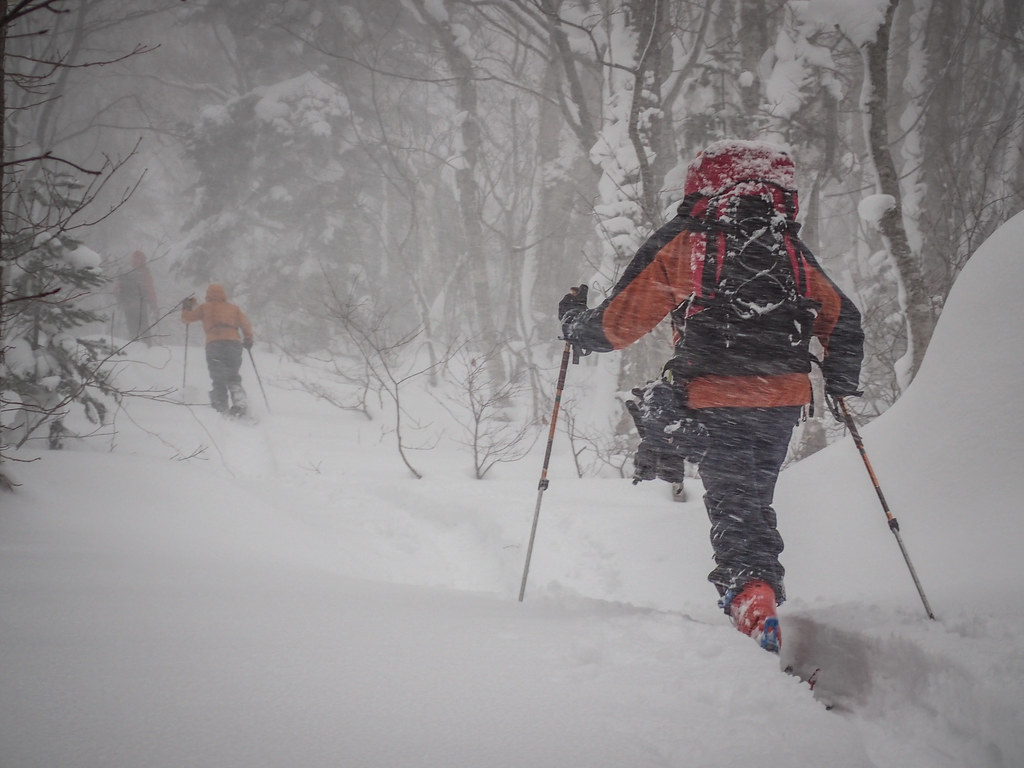
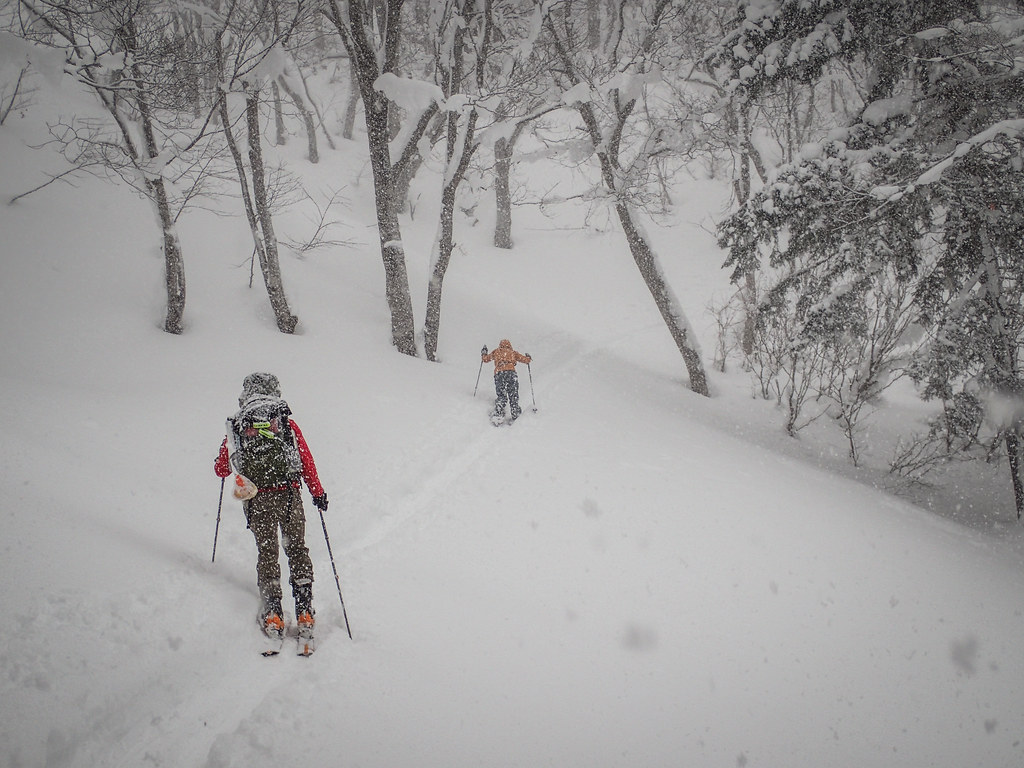
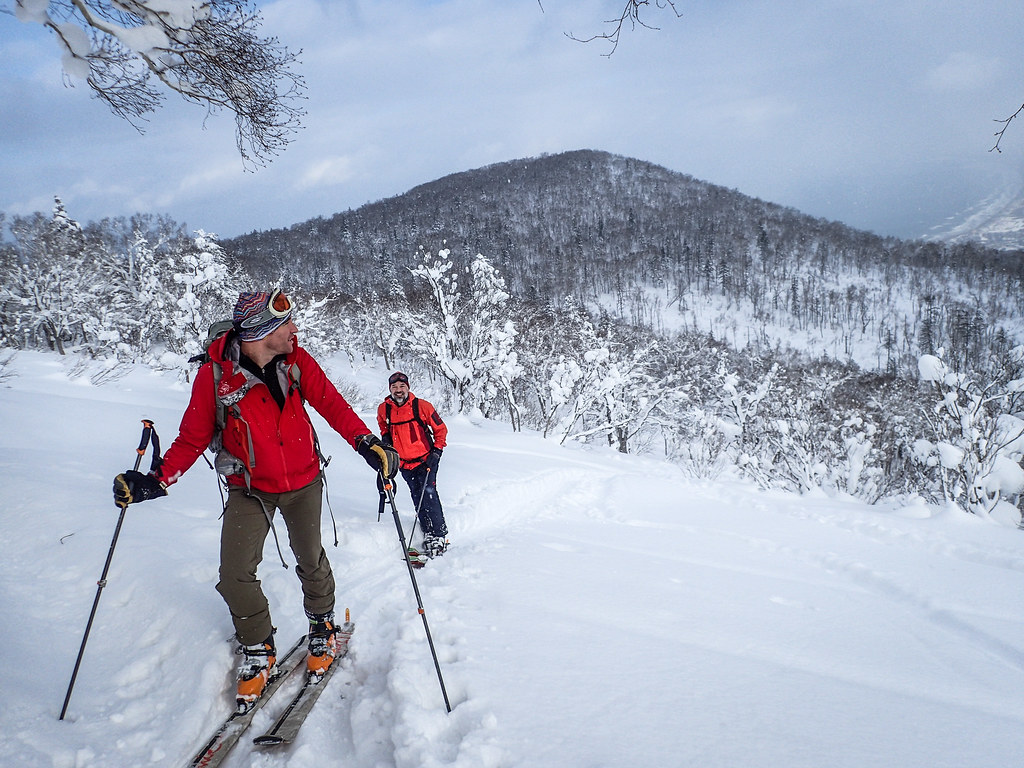
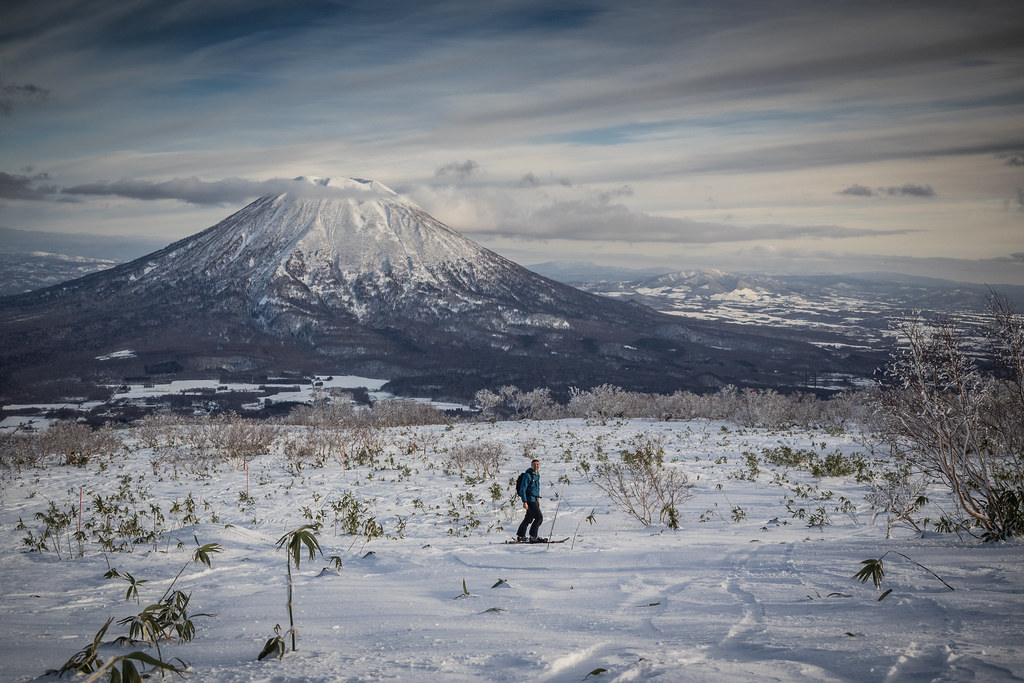
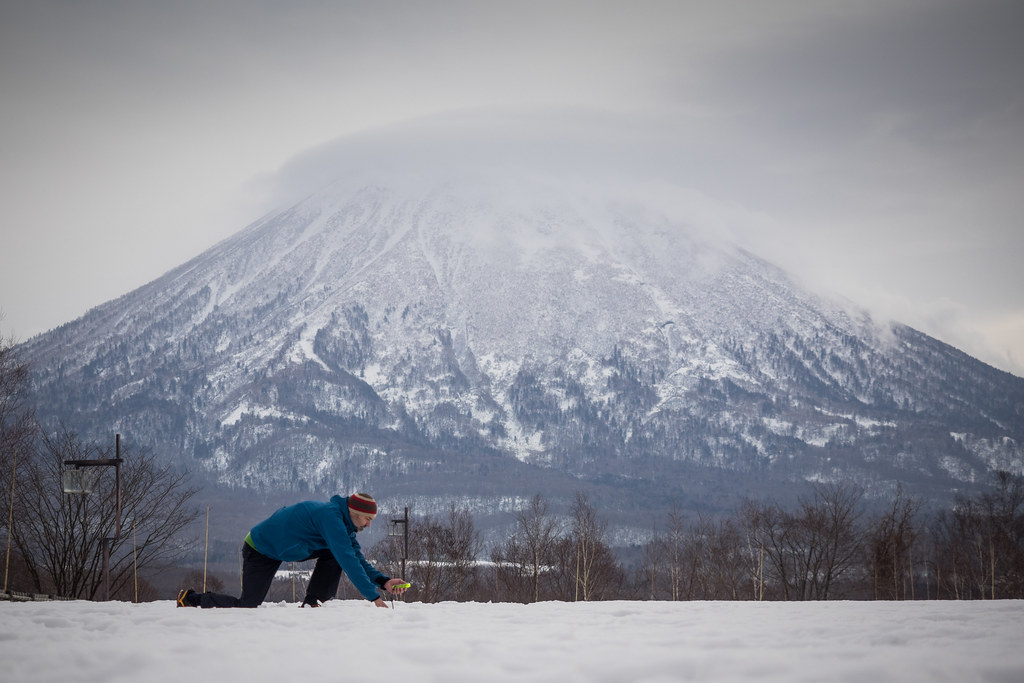
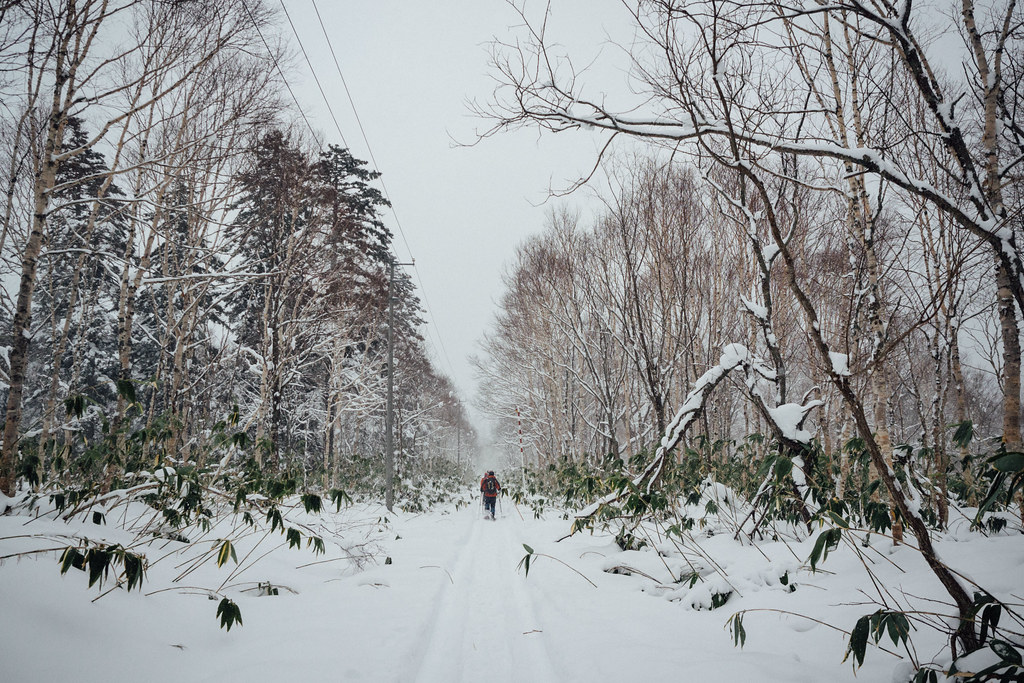
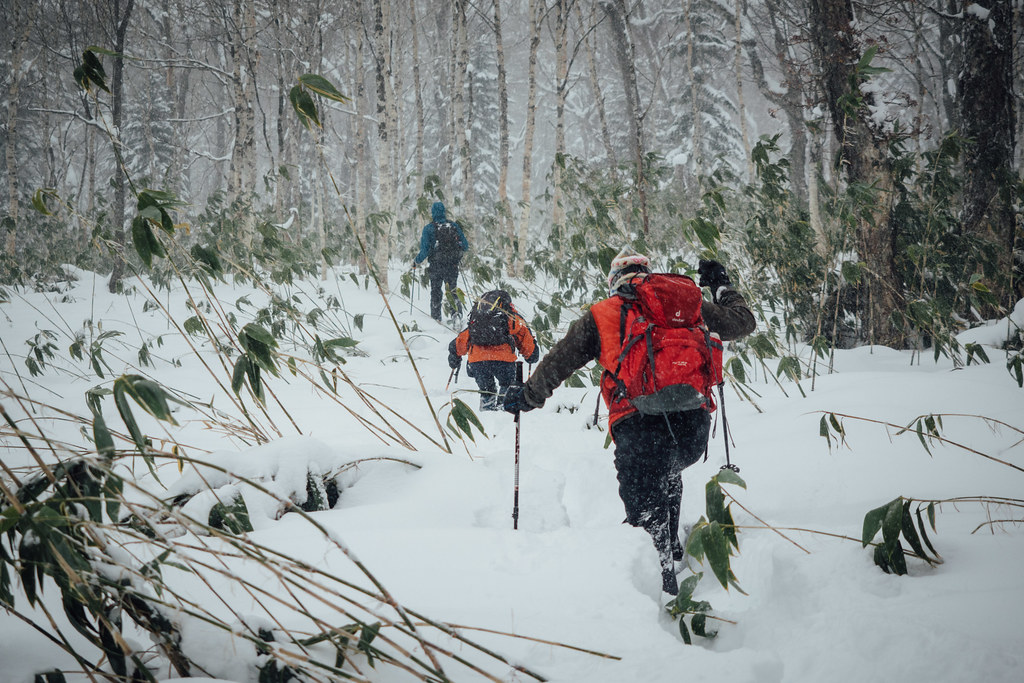
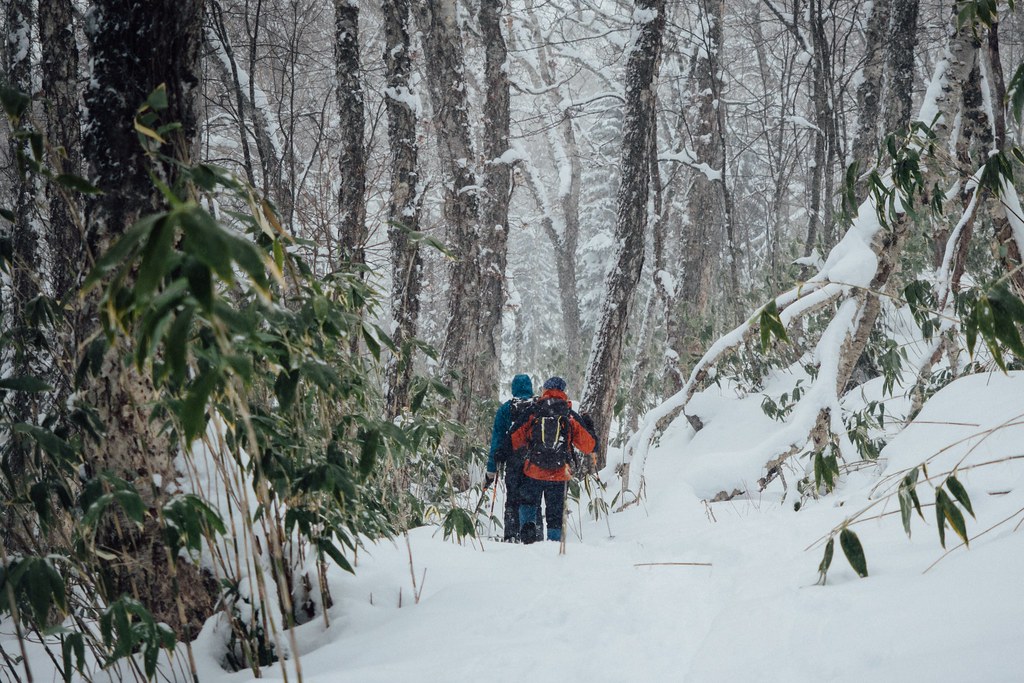
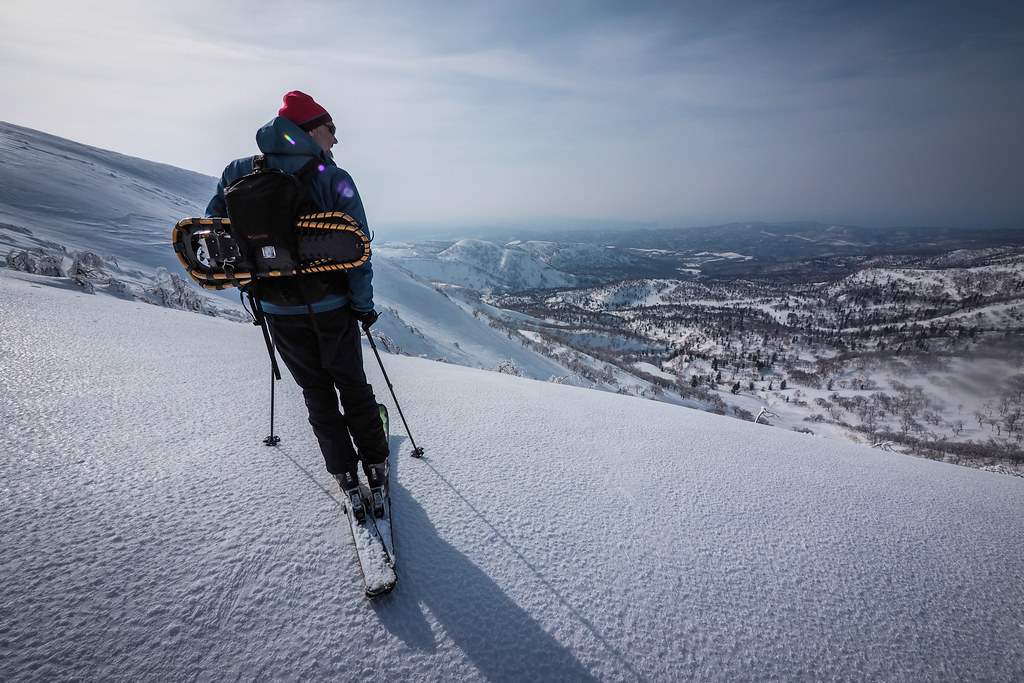
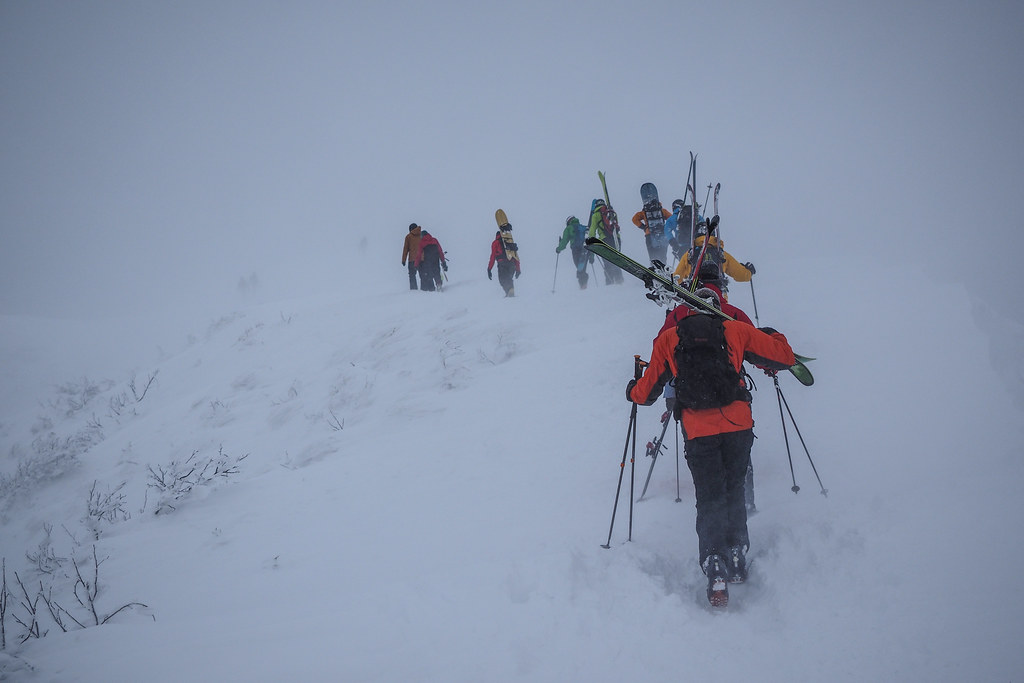
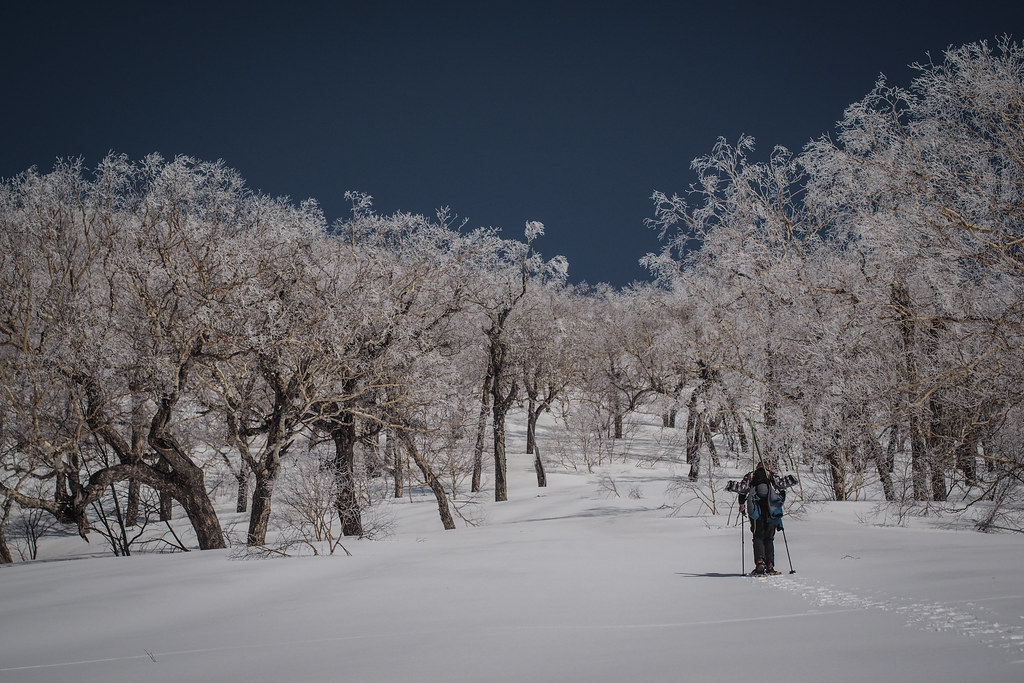
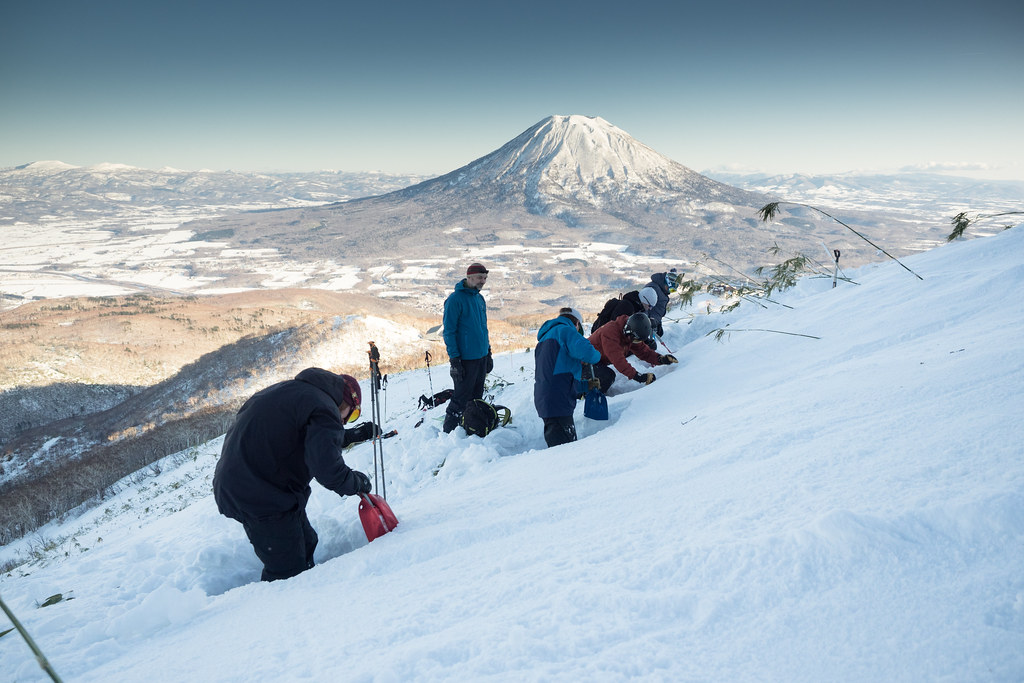
On one occasion at the top of Mt. Annupuri at 1300m (just after I took the picture below with the hiking skiers), with the ambient temperature at around -15 deg C and the wind howling at around 30km/h, the electronic viewfinder started to flicker a little. The camera had spent around 2 hours hanging around me on a shoulder strap, with no case. Pictures taken using the electronic shutter, however, came out fine.

Lines of intrepid skiers hiking to the top of Mt. Annupuri (Niseko, Hokkaido, Japan)

Group of four showshoeing towards Kimobetsu-dake in November (Nakayama Pass, Hokkaido, Japan)

In-body stabilization

One of the standout features of the OM-D E-M1 that I really appreciate is the in-body stabilization. In many cameras, the lenses have little motors built into them that compensate for the small movements of the hand when holding the camera. The sensor in these cameras are generally fixed and don’t move. In the OM-D E-M1 however, when the power is on, the sensor moves, acting as a 5-axis stabilization device. Apart from the advantage of suddenly being able to use old non-stabilized lenses as ‘stabilized’ lenses, the Olympus in-body stabilization is simply amazing.

Speeding downhill on a Genesis bicycle on the Lake Shikotsu Cycling Road (Sapporo, Japan)

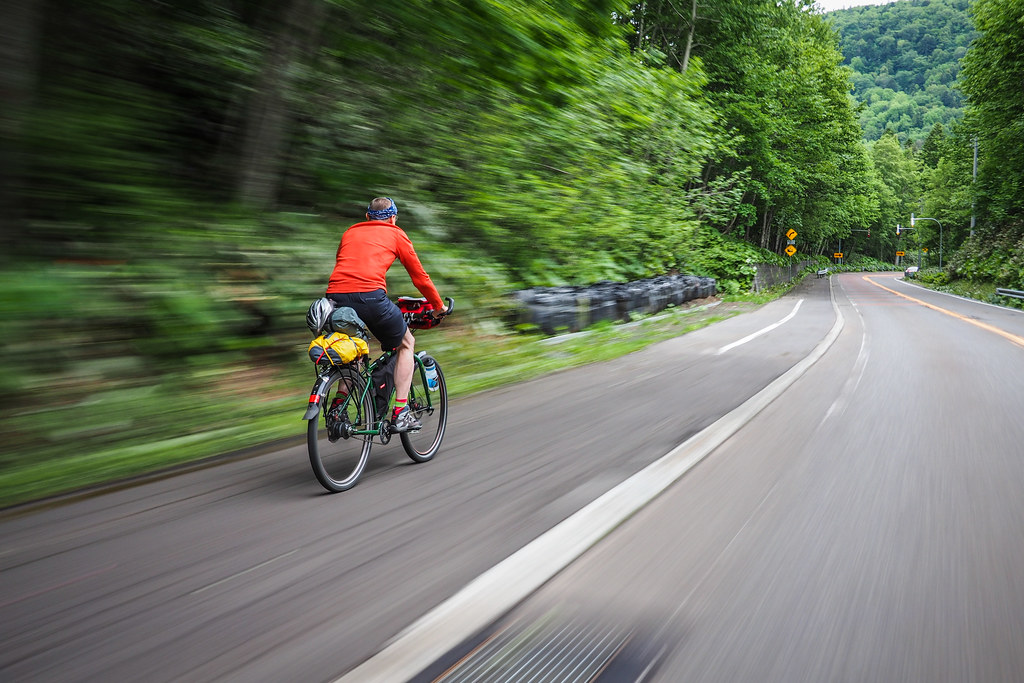
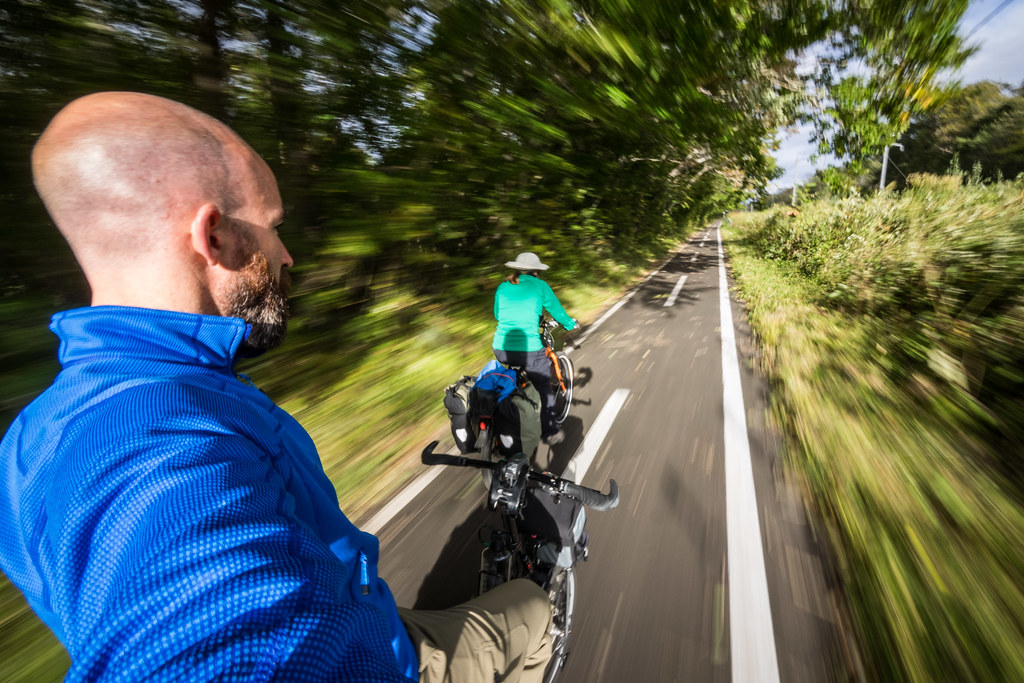
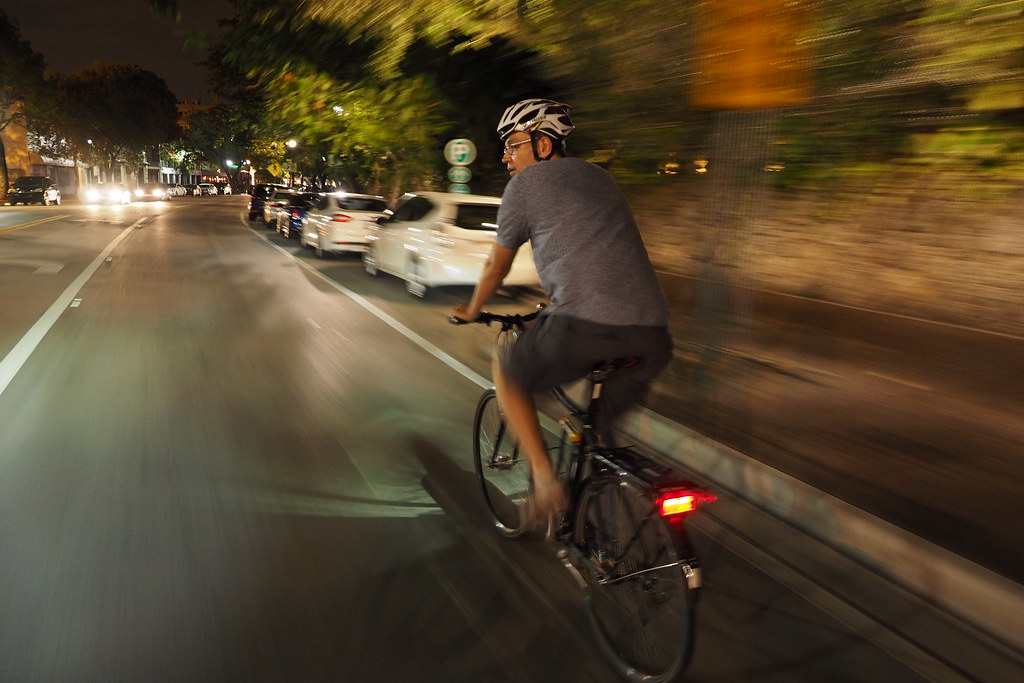
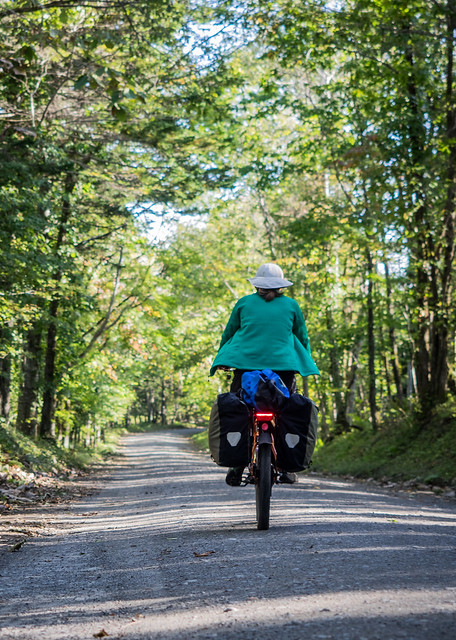
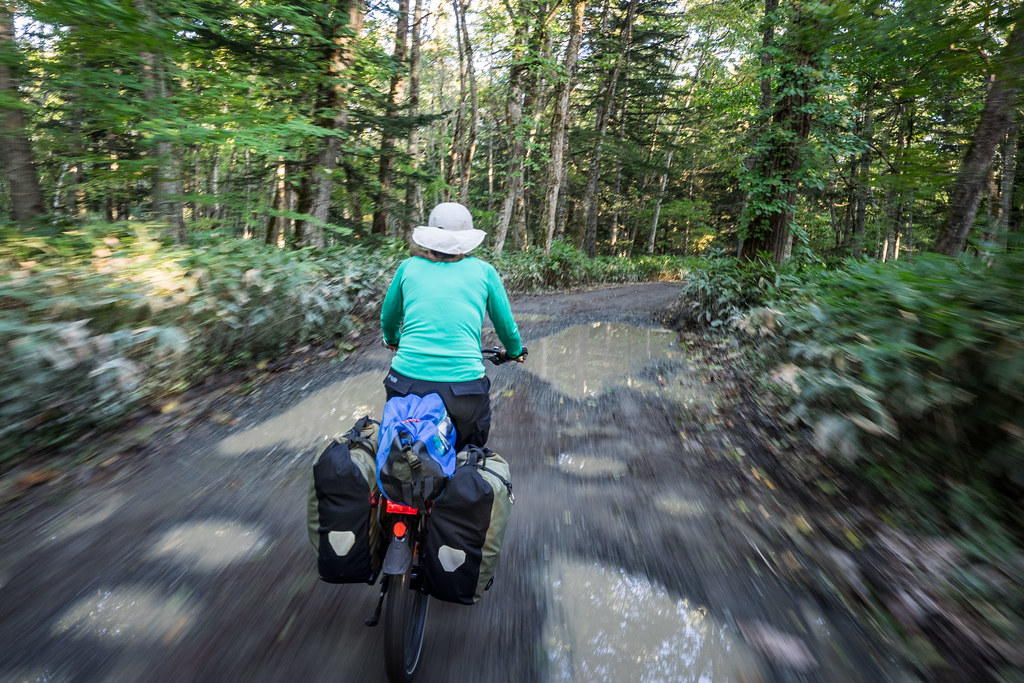
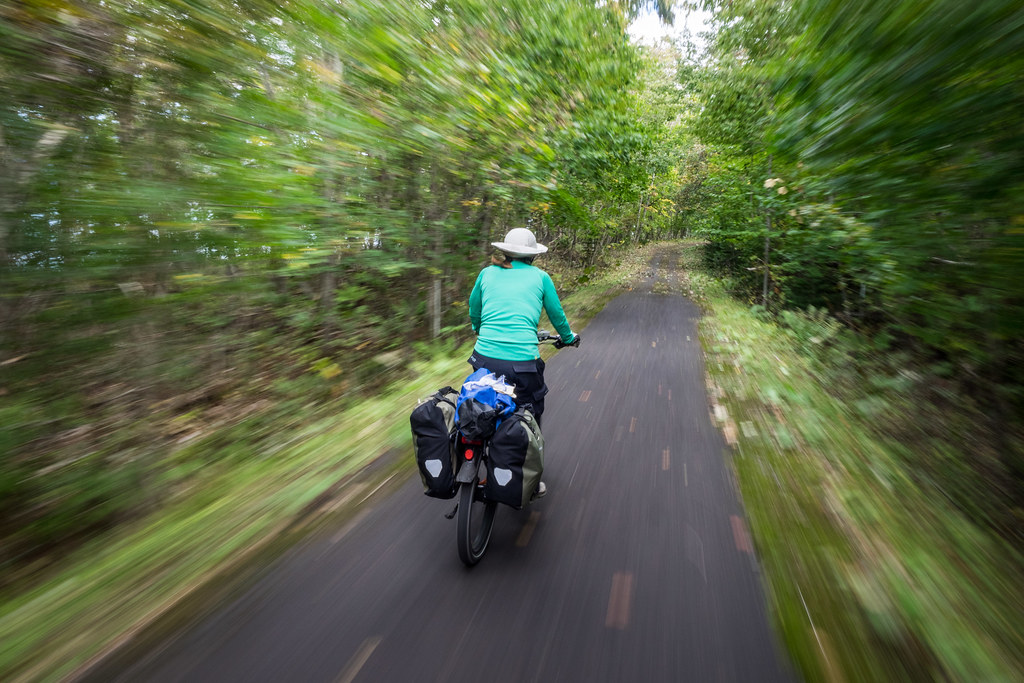
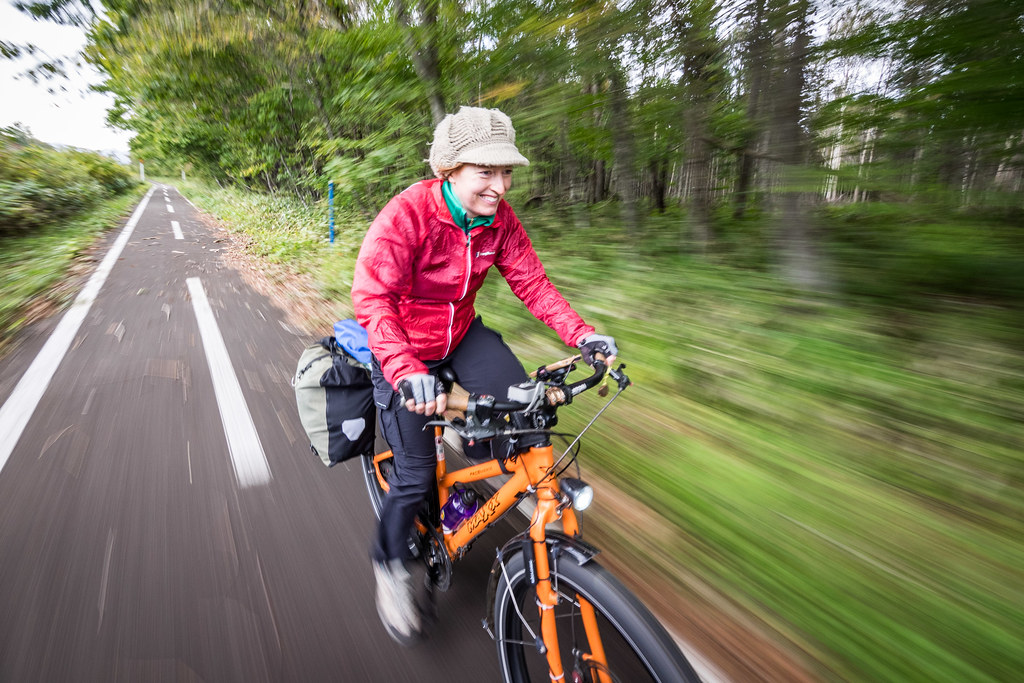
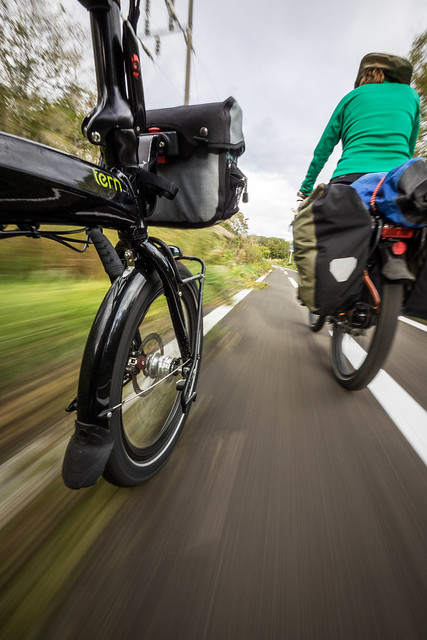
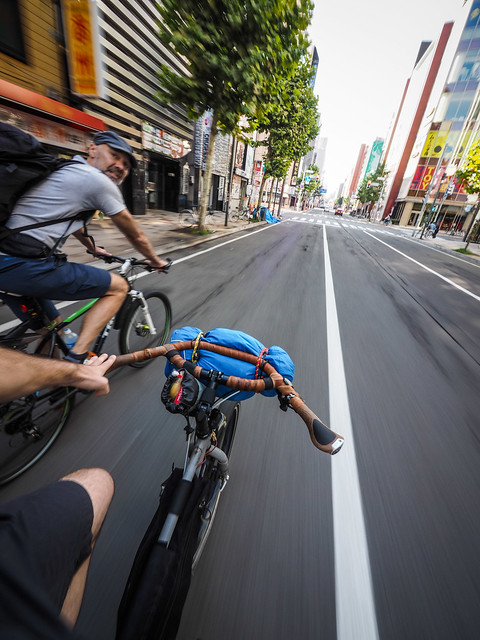
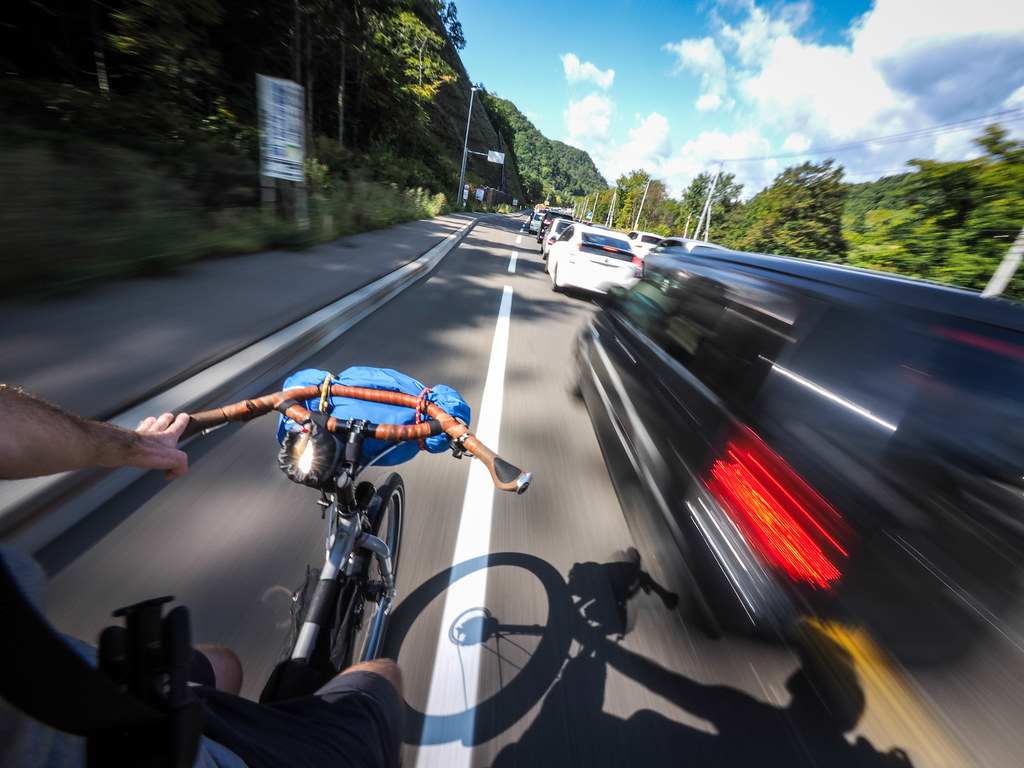
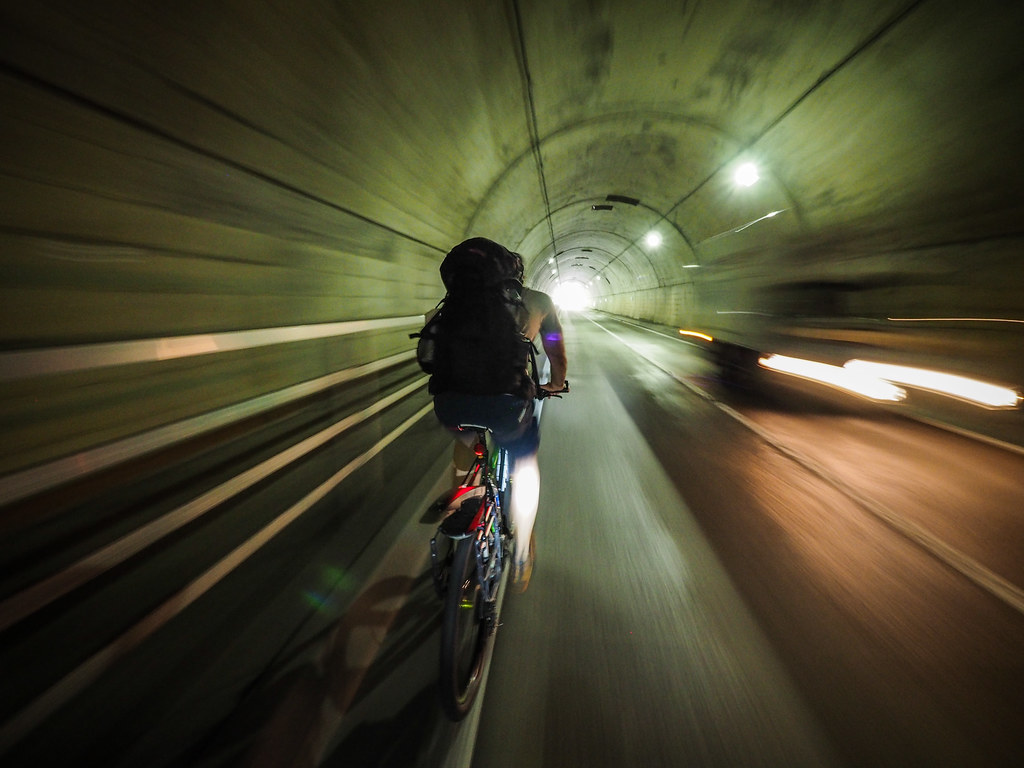
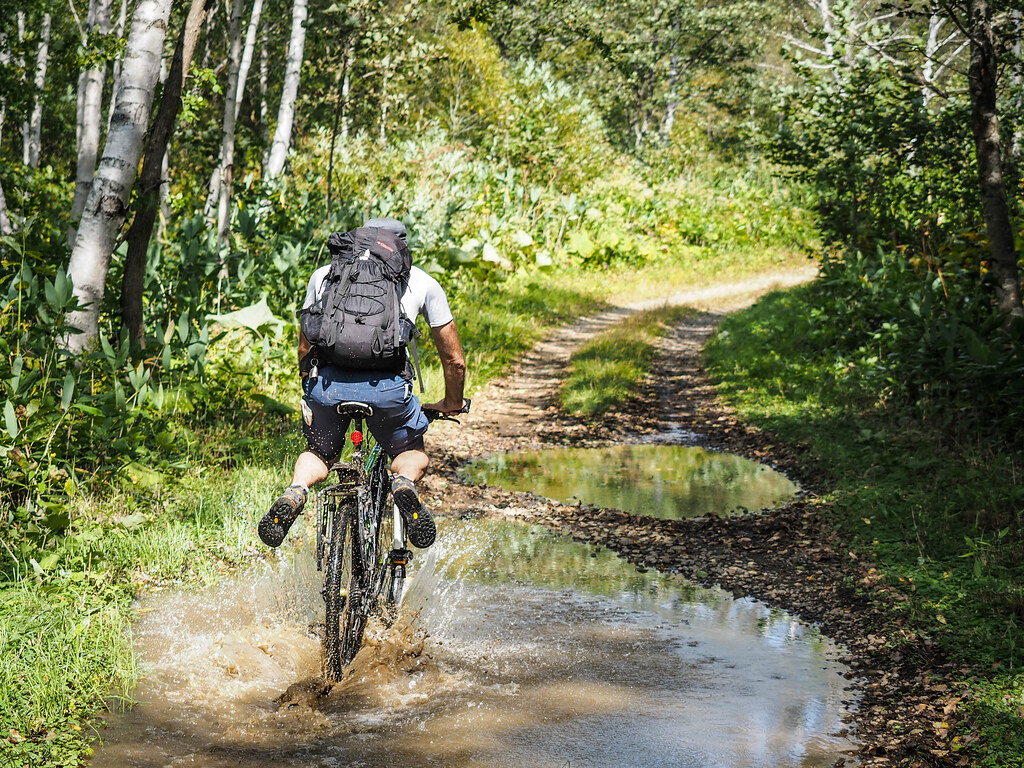
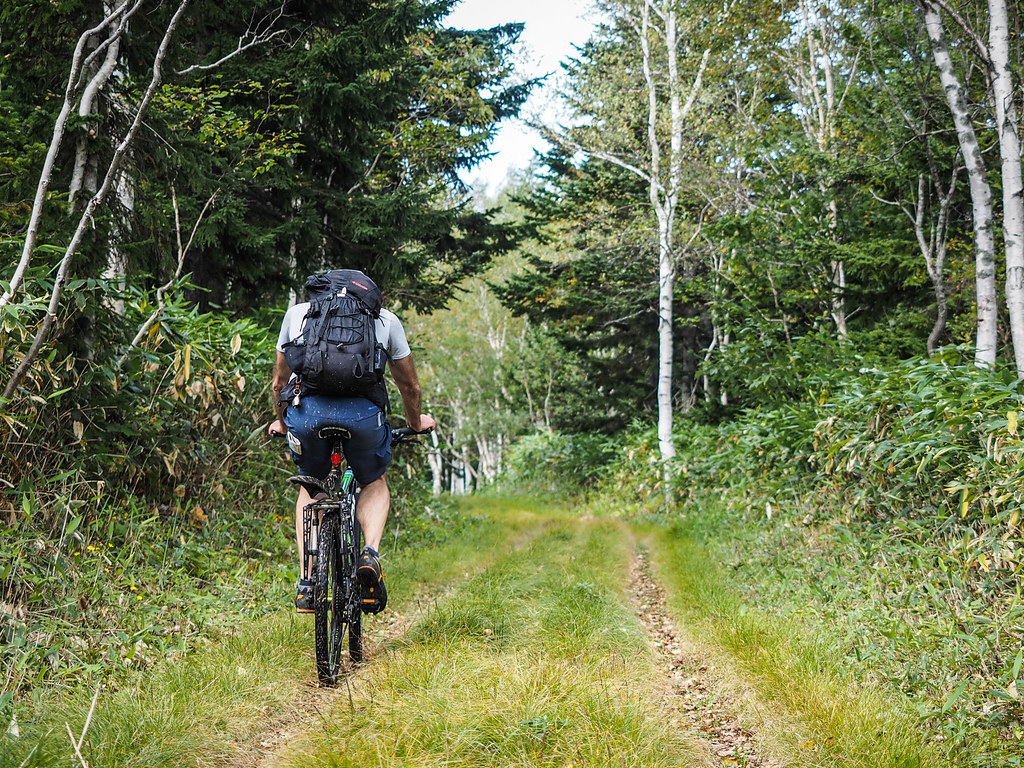
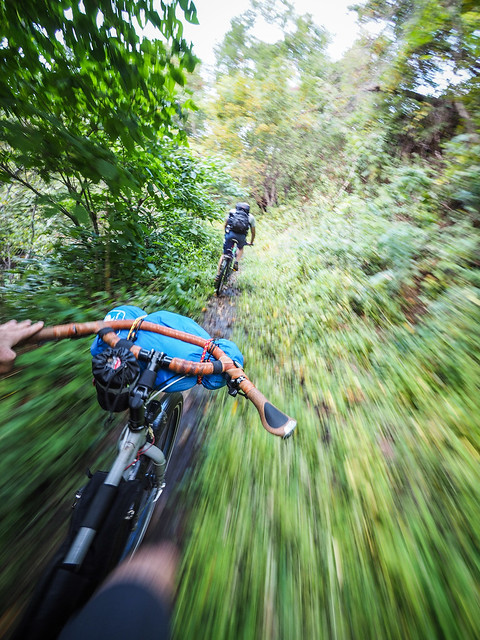
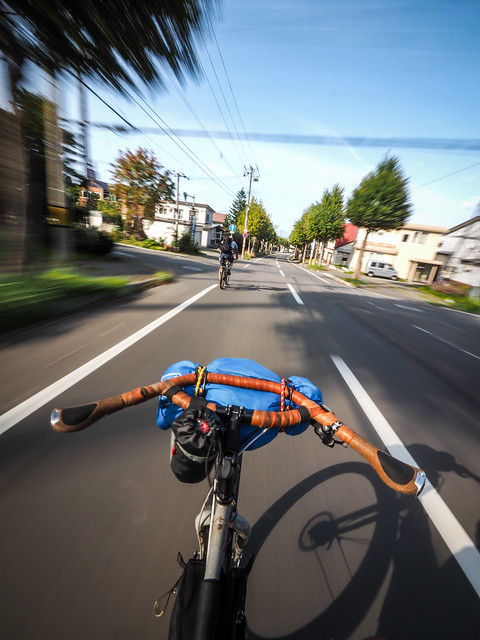
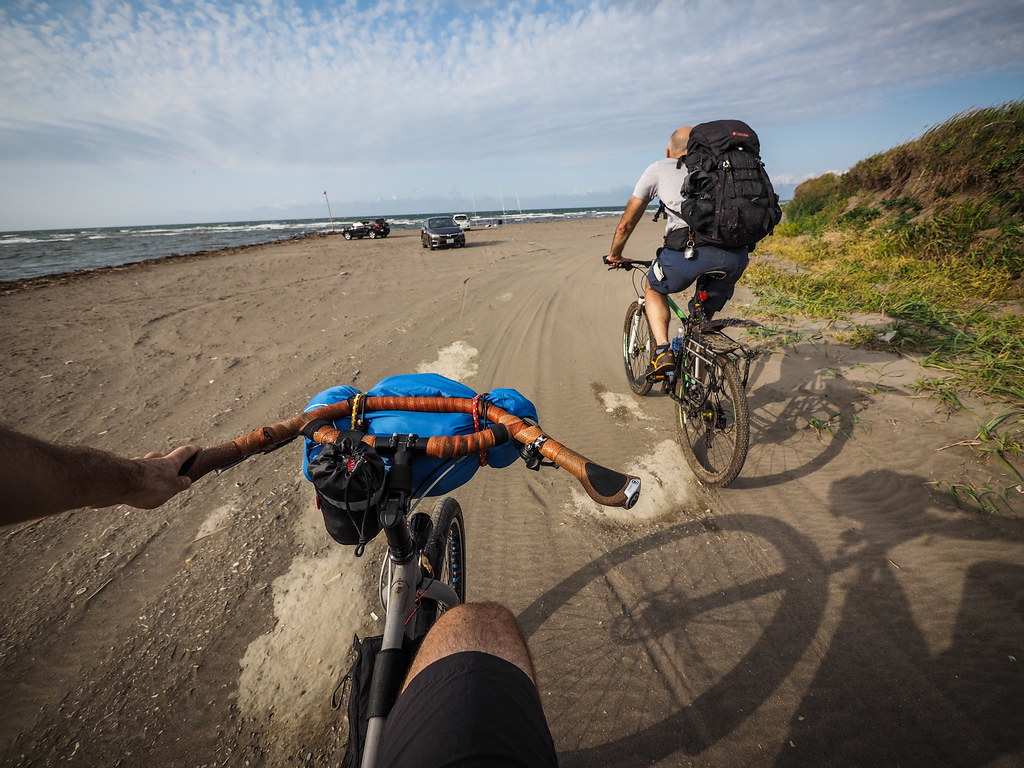
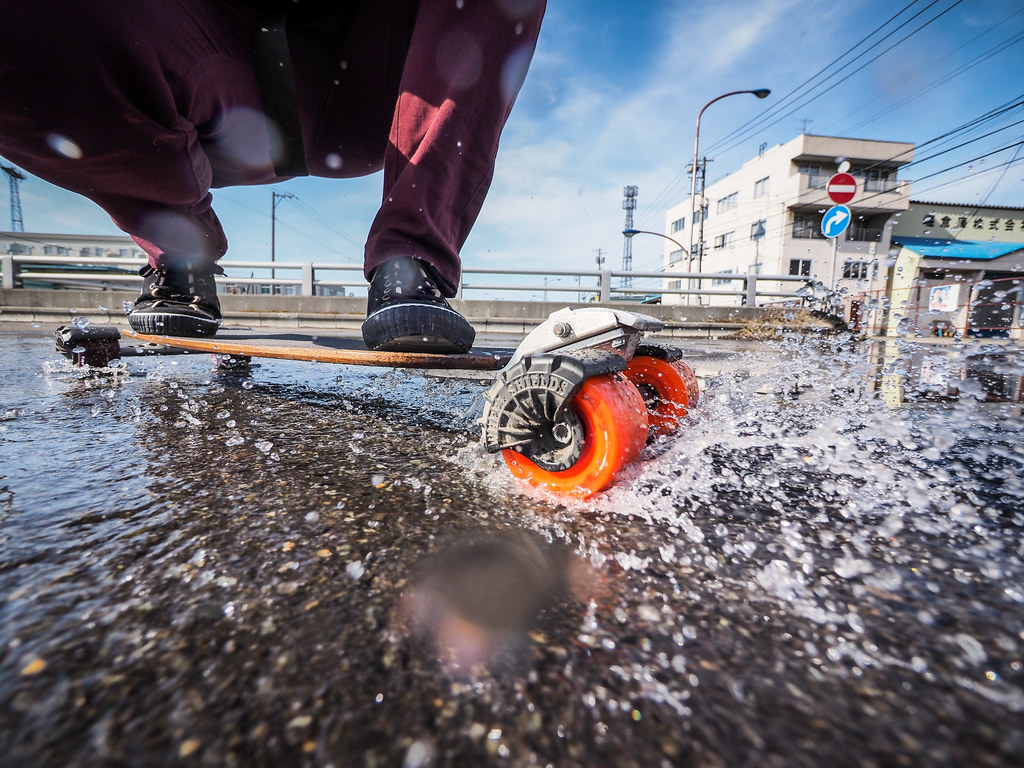
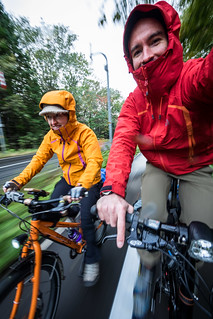
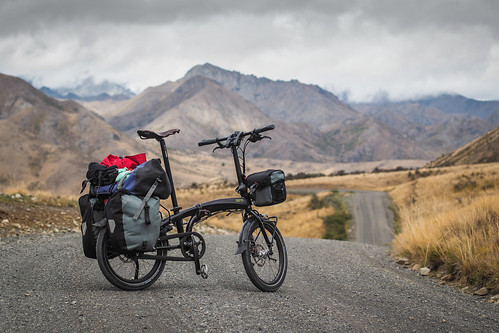
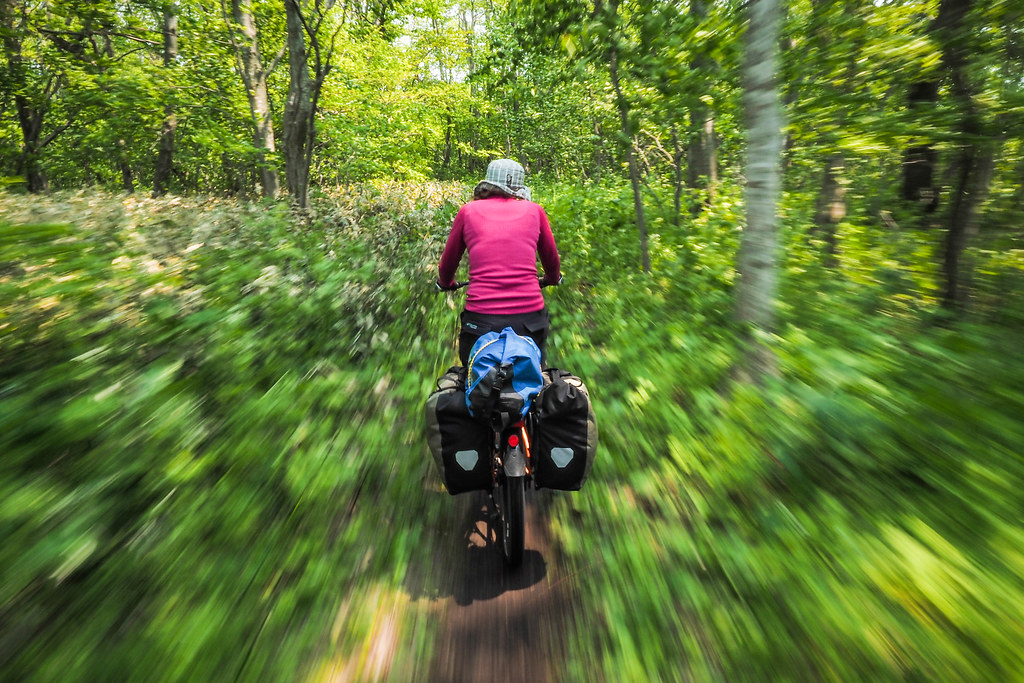
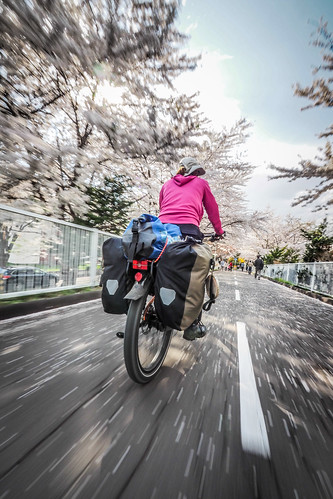
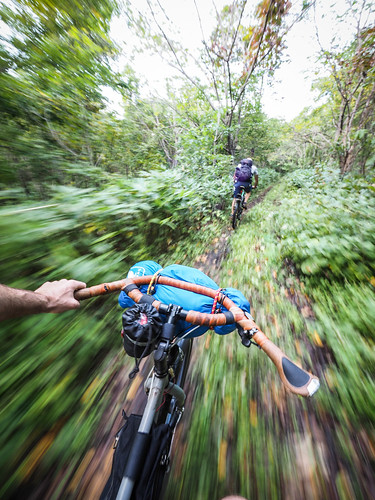
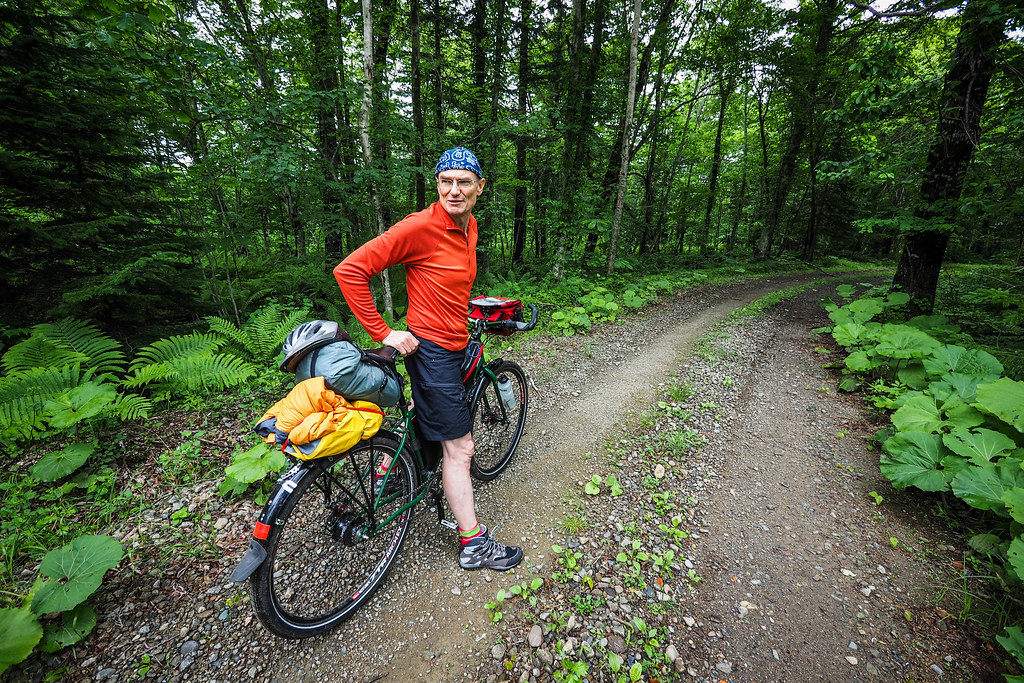
I push the limits of this in-body stabilization most frequently when taking photos while riding my bicycle. I love to capture the sense of speed of flying downhill, which requires taking a photo at a fairly slow shutter speed. I’ve found that in general, I can capture photos such as the one above at speeds as slow as 1/10 of a second, so long as I have the camera set to high-speed continuous shot, and just point the camera at the subject, hold the camera as stable as possible, and take up to 20 photos in succession. Usually a few shots will come out with the subject nice and crisp, with some great speed blur. This requires me to ride no-hands, with both hands holding the camera steady. A shutter speed of 1/30 of second produces more reliable results when shooting one-handed. And of course, for the best speed-blur shots, the wider angle the lens the better.

Camping and BBQ in Aoba Park, Chitose City, Hokkaido, Japan

Shiroishi Cycling Road in full blossom mode, Sapporo, Japan          A bike ride from Harukayama to Ishikari Bay, Hokkaido, Japan

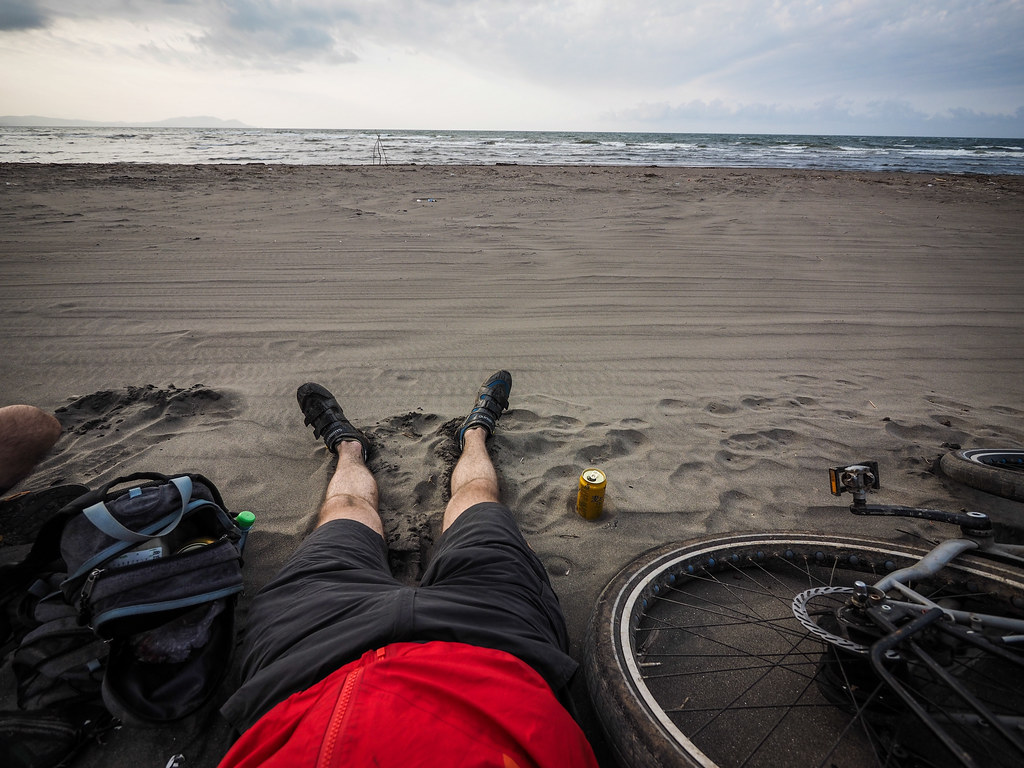
It is not only when moving that I realize the benefit of the stabilization. I can take hand-held shots with a shutter speed as slow as 1 second and still get usable results.

Inside Okuteine Hut (Sapporo, Hokkaido, Japan)

Live Composite feature

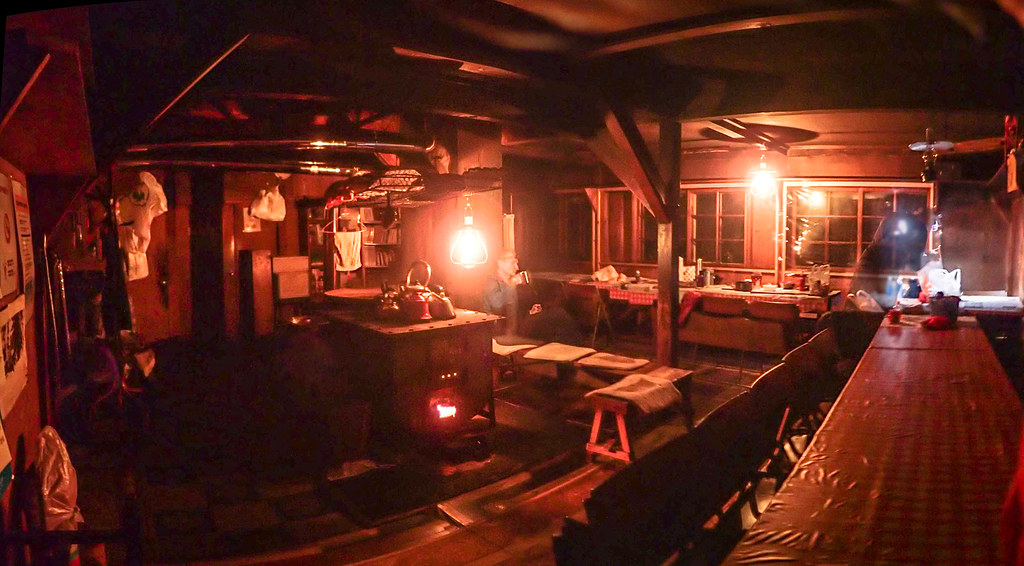
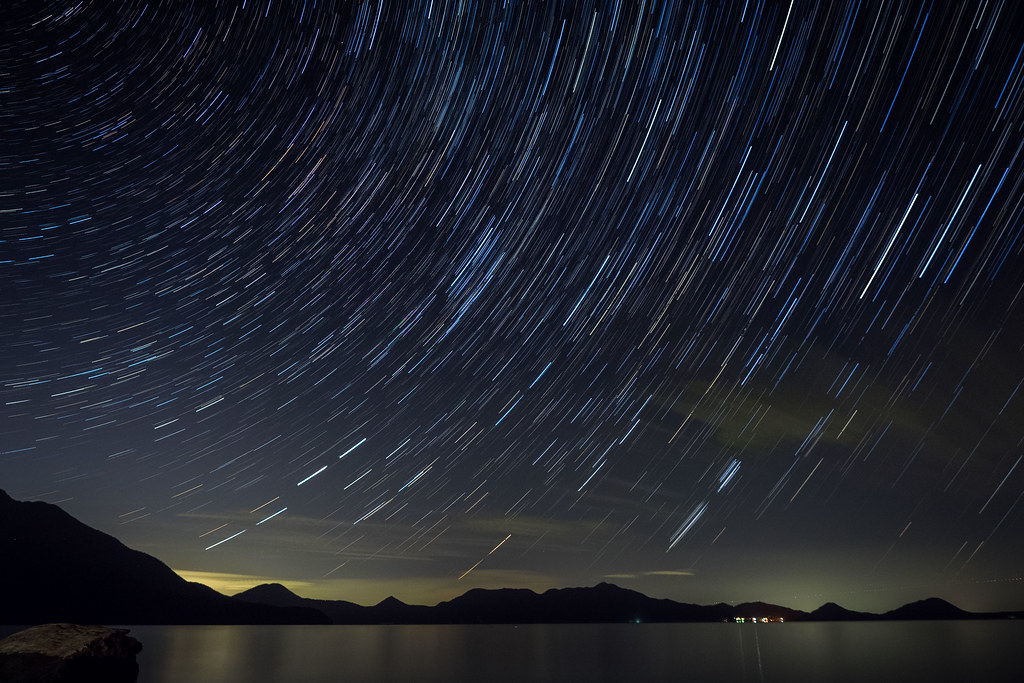
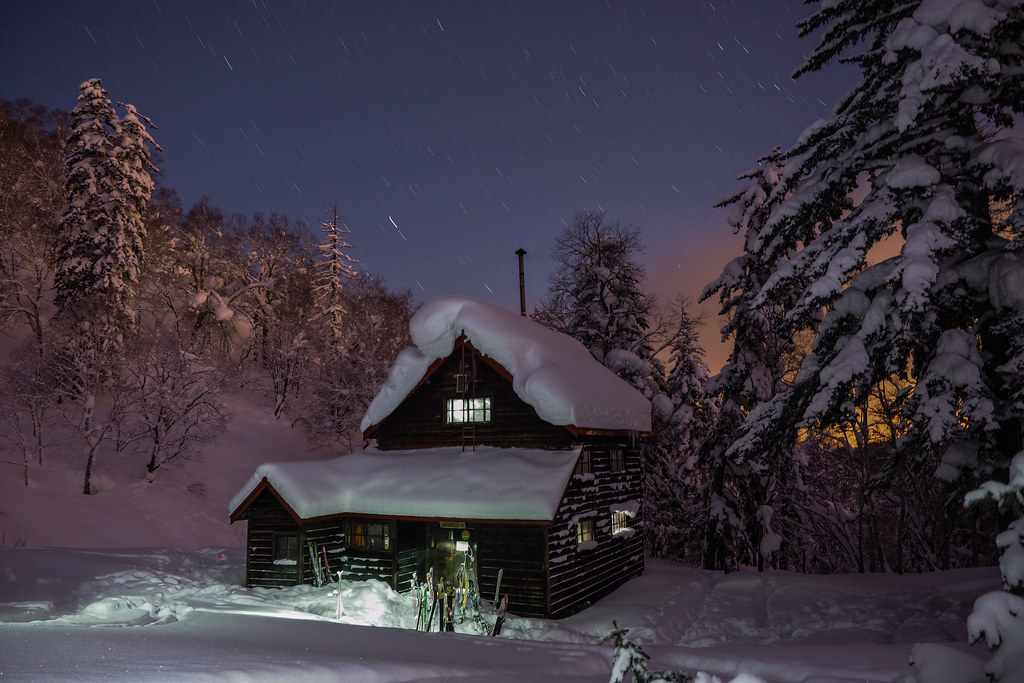
The Olympus OM-D E-M1 camera has a special long-exposure feature called Live Composite, mainly for night time photos such as capturing star trails. When this setting is engaged, the camera first takes one photo, and then takes a succession of other photos over as long a period as the user wants. All these photos are then merged together. The amazing thing is that with this feature, the camera only merges the bits of the successive photos that have changed in brightness. This way, it is possible to have a long exposure effect where it is possible to capture the movement of stars, without buildings and trees etc in the foreground becoming too over-exposed.

I’ve not used this feature all that often, but when I have, it produces great results.

Camping at the Bifue Campground on Lake Shikotsu, Hokkaido, Japan

Yama-no-Ie Hut near Mt. Okuteine (Hokkaido, Japan)

Massive selection of lenses

For my camera I own the following lenses: Olympus 12-40mm f/2.8 PRO (weather sealed), Panasonic Lumix 7-14mm f4, Panasonic Lumix 20mm f1.7, and a number of old Canon FD lenses (50mm 1.4, 135mm f2.5, 200mm f4) using a Canon FD to micro four-thirds adapter.

In reality these days, for outdoor adventure use, I find the two zoom lenses (Olympus 12-40mm and Panasonic 7-14mm) to be the most versatile. I rarely take any of the prime lenses with me on trips any more. Primes are fun, and restricting oneself to one focal length can force artistry. But I find that zoom lenses are the way to go when zooming with your legs is difficult (picture yourself 50 meters away from someone who is moving away from you, in waist-deep powder, and you want to take a picture of them). The two zooms that I do have are beautifully sharp and have great contrast. If the 7-14mm Panasonic lens was weather sealed, then it would be perfect (I know that Olympus has a 7-14mm PRO lens that is weather sealed, but it is relatively massive and weighs a ton).

Aside from what I own, there is a growing selection of excellent lenses to choose from. As much as I don’t use primes much these days, I think my next lens acquisition would be the Olympus 75mm f1.8 lens. That is a very sharp and bright lens!

Skiing Mt. Yoichi near Sapporo, Hokkaido, Japan

Off-the-beaten-track forestry roads between Lake Shikotsu and Chitose City, Hokkaido, Japan

Review – the stuff that could be improved

Video quality

The video quality on the OM-D E-M1 is perfectly usable. But, it is way out of the league of Panasonic’s offerings. I don’t necessarily need massive resolutions such as 4K, but I do wish it had a 60fps option, and higher bitrates. That said, it still produces some nice footage. The two videos below are ones that I shot on the OM-D E-M1.

Dynamic range

I’m not sure if this is something that can realistically be improved much, beyond the quality of the Olympus OM-D E-M1, on a micro four-thirds sensor. Olympus really gets the most out of a relatively small sensor. But I still drool over what a full frame mirrorless camera like the ones by Sony produce. I still feel like there are situations where a full frame sensor would outperform a micro four-thirds camera on dynamic range. That said, if you’re OK with fiddling with the RAW files, it is possible to improve things a little.

Whiteroom Tours Avalanche Awareness Course in Niseko, Hokkaido, Japan

Overall impressions and final remarks

I am happy with the combination of compact size, low weight, and amazing image quality that the Olympus OM-D E-M1 offers. The range of lenses available, as well as its ruggedness for adventures in the outdoors, is fantastic. And you cannot beat the in-body stabilization. I do find myself drawn in the direction of the Sony Alpha 7 series of cameras, due to their full frame sensors, but the added weight and bulk of their full-frame sized lenses put me off. At this point in time, I feel like the Olympus OM-D E-M1 is the ultimate camera for human-powered adventures.

Climbing Mt. Tsuge from Yama-no-ie Hut (Mt. Okuteine, Hokkaido, Japan)

Kumiko and her awesome XS sized Surly Pugsley with self-made custom bike packs (Lake Shikotsu, Hokkaido, Japan)

Tern Verge S27h in San Cristobal de las Casas (Mexico)

On the Chitose Cycle Path to Lake Shikotsu, Hokkaido, Japan

Hokkaido Ski Touring: Mt. Okuteine, Yama-no-ie Hut and Mt. Tsuge (Sapporo, Japan)

The Yama-no-ie Hut, tucked below Mt. Okuteine on the outer reaches of Sapporo City, is everything you can expect from a mountain hut managed by largely ambivalent Japanese university students: dingy, messy, and a glowing red-hot potbelly stove kept that way by the intrepid first-year students who hauled the coal up the mountain on their backs. But it’s that charm that makes the 4 hour ski tour to the hut, via Mt. Okuteine, more than worth while.

Climbing Mt. Tsuge from Yama-no-ie Hut (Mt. Okuteine, Hokkaido, Japan)

Essential Info

Location of Yama-no-ie Hut (43°04’35.2″N 141°09’10.2″E on Google Maps)

Mt. Okuteine Route GPS track recorded by Angelo (download here: KMZ, GPX)

Route in 3D with Geospacial Information Authority of Japan topographical map: http://www.yamareco.com/modules/yamareco/cesium.html?did=799886&map=JGSI

Yama-no-ie (Okuteine) Hut Essential Info

  • In principle, overnight stays must be pre-booked and paid up at Hokkaido University. Either call 011-706-7456 directly to book, or if your Japanese is rusty, then head straight to the No. 3 window on the ground floor at the Institute for the Advancement of Higher Education at Hokkaido University to book and pay (location on Google maps).
  • On the weekends, Hokkaido University Wandervogel club members, from the club that manages the hut, are at the hut from late morning on Saturday to early morning on Sunday. On weekdays there is no manager at the hut but is unlocked and can be used.
  • Hut fees are 80 yen for general public, free for Hokkaido University affiliated people.
  • The hut has a limited number of old dirty matresses and blankets, so you may want to bring your own sleeping bag and mat. In particular on the weekends it is first in first served on the bedding.
  • The hut is heated with a coal stove, with copious amounts of coal available for use. Newspaper for starting the fire is also supplied. Use copious amounts of newspaper, rolled tightly, to light the coal (i.e., fill the stove half or more with paper, and put some coal on top).
  • The coal stove can bring a large pot of water to boil in about 1 hour, so bringing your own stove is recommended for cooking.
  • The hut has running water, flowing 24/7 in winter to avoid freezing the pipes.
  • An assortment of pots and pans, cutlery and plates are available for use (they will likely need to be washed before using).
  • Boots can be worn inside the hut on the ground floor in winter, but the upper two floors are socks only.
  • Kerosene lamps are available for use for lighting.

Climb and Ski Report

It was only a couple of weeks ago that I was up at the Ginreiso Hut at the foot of Mt. Haruka (blog post here), but even then I was eyeing up another backcountry hut, the Yama-no-ie Hut directly due south of the summit of Mt. Okuteine (full route map and GPS file at the end of this blog post). Mt. Okuteine is just along a ridge from Mt. Haruka, and also offers some fairly straight forward navigation up to some expansive views over Ishikari Bay. And all of this still within the Sapporo City limits.

Joining on this trip was Dirk, as well three Europeans I’d never met before until a couple of days before the trip: Mathieu and his brother Vincent, both French, and their longtime Greek-but-living-in-France friend Angelo. Mathieu had gotten a hold of me via Warmshowers.org, since he had, up to coming up to Hokkaido, been on a two-year long cycle journey around the world. The plan was to take three weeks out of the cycling journey, hire a car with the other two, and do some ski touring in Hokkaido. The timing of their arrival perfectly coincided with the Mt. Okuteine trip that Dirk and I were planning. So for me, this weekend long trip ended up being an opportunity not only to show some visitors some quintessential Sapporo winter hills, but also help orient some travelers on the finer points of traveling in Japan.

This naturally began with taking Mathieu and co. to the local supermarket (Chitose Aeon Supermarket – location) to buy supplies for their three week trip…

Preparing skis and buying supplies for a Hokkaido backcountry ski trip (Chitose City, Japan)

And the three of them commandeering our spare room to stay the night before the trip and prepare their ski gear.

Preparing skis and buying supplies for a Hokkaido backcountry ski trip (Chitose City, Japan)

Preparing skis and buying supplies for a Hokkaido backcountry ski trip (Chitose City, Japan) Preparing skis and buying supplies for a Hokkaido backcountry ski trip (Chitose City, Japan)

Preparing skis and buying supplies for a Hokkaido backcountry ski trip (Chitose City, Japan)

The next morning was an early start for us all from Chitose City. We had arranged to meet Dirk in Sapporo at 7:30am on the way to Lake Sapporo, where we would park the car and start the ski up Mt. Okuteine and to the hut. This meant leaving Chitose bright and early at 6:30am. All the preparations of the previous days paid off, however, and we made it to Sapporo only half an hour late, and were at the trailhead by just after 9:30am.

TOP TIP: The parking area is here (https://goo.gl/maps/qqbcqYrmGe32)

Climbing up to Mt. Okuteine (Hokkaido, Japan)

By the time we left the car park, a light snow had started to fall, which would continue while we trudged along the flat forestry road…

Climbing up to Mt. Okuteine (Hokkaido, Japan)

And up onto the main wide ridge up to the peak of Mt. Okuteine.

Climbing up to Mt. Okuteine (Hokkaido, Japan)

Climbing up to Mt. Okuteine (Hokkaido, Japan)

Once we were at the top, however, the skies cleared and allowed a huge view over Ishikari Bay and the northern parts of Sapporo City.

Climbing up to Mt. Okuteine (Hokkaido, Japan)

We didn’t stick around at the top for too long, however. Just enough time to gobble down a very quick lunch, before setting off due south for the Yama-no-ie Hut.

Climbing up to Mt. Okuteine (Hokkaido, Japan)

For the first time on a backcountry trip, I had downloaded a GPS tracklog from Yamareco.com, which more or less mirrored the route marked in the Hokkaido Yukiyama Guide (ISBN978-4-89453-804-7). Using this made navigation very straight forward, but I had a paper map in my pack just in case the electronics failed. Angelo was the chief navigator for the summit-to-hut route.

Climbing up to Mt. Okuteine (Hokkaido, Japan)

We arrived at the hut just before 2pm, which made it just over three hours from trailhead to summit to hut.

Yama-no-Ie Hut near Mt. Okuteine (Hokkaido, Japan)

The Yama-no-ie Hut (literally ‘mountain house hut’) is officially managed by the Hokkaido University Wandervogel Club. Staff and students of Hokkaido University can use the hut for free, whereas the general public pay 80 yen a night (around $0.80 a night). Registration and payment to use the hut must be done in advance at the university. Call Hokkaido University on 011-706-7456 to book. Details on all the Hokkaido University wilderness huts are here: https://www.oia.hokudai.ac.jp/about/facilities/event-and-seminar-spaces/lodges-and-huts-2/. That said, Wandervogel club members are at the hut on Saturdays and Sundays from December till April, and on weekdays and outside of the winter period, the hut is unmanned but unlocked and free for use.

The hut is heated with a gloriously inefficient potbelly stove, fueled by coal. By inefficient, I do not mean that it does not heat the hut. If kept fueled, the stove will heat all three stories of the hut, with it’s long flue which runs the entire height of the hut in the middle of the open mezzanine floors. By inefficient I mean that there is next to no possible way to restrict air to the stove, which means that the stove is always running at full bore. Because we arrived at the hut before the club members, we decided to get the fire going to warm the place up. I managed to get the stove going using a mass of newspapers and half a bucket of coal (all supplied: every last piece of coal is lugged up the mountain by Wandervogel club members in the summer months and stored away for use during winter), but we soon found that if a whole bucket of coal is put into the fire, then that bucket of coal will be reduced to ashes in less than an hour. The three-story high flue draws a draft like nothing else.

After getting the stove running, four of us headed up the hill from the hut for a few runs of powdery skiing. And powdery it was. The hike up took about 20 minutes, and the ride down was over in less than two minutes, but it was all worth it.

Backcountry skiing near Yama-no-ie Hut (Mt. Okuteine, Hokkaido, Japan)

When we arrived back at the hut, another 16 or so people had turned up. 6 in one group, 10 in another. This made for a rather chaotic evening of maneuvering around each other and tables and pots and dirty plates and hanging clothes and skins. On our menu was a Japanese hotpot nabe. The original plan was to have chicken and pork in the hotpot, but we realised at the trailhead that the box containing the meat, bread, and eggs for breakfast the next day had been left at our apartment. We had plenty of tofu and udon noodles though, so we made do.

Yama-no-Ie Hut near Mt. Okuteine (Hokkaido, Japan)

Sharing our table was a group of Wandervogel OBs. “I graduated from Hokkaido University in 1974,” boasted one of them, already clearly under the influence of a mix of beer, Japanese sake, and whiskey. He, and most of the other Hokkaido University Wandervogel alumni were well into their 60′s but still made the pilgrimage to the hut on a regular basis.

Yama-no-Ie Hut near Mt. Okuteine (Hokkaido, Japan)

Yama-no-Ie Hut near Mt. Okuteine (Hokkaido, Japan)

Before heading to bed, Dirk floated the idea of getting up early the next day and skinning up to the ridge above the hut to see the sunrise. So we all headed to bed fairly early. And were summarily woken by Wandervogel OBs talking loudly into the wee hours of the morning…

Yama-no-Ie Hut near Mt. Okuteine (Hokkaido, Japan)

It was definitely worth getting up early for the sunrise, however. I initially found myself half asleep as we trudged up yesterday’s traces, now covered in a few centimeters of new snow. However, I think it was Dirk’s shriek of delight that brought my attention to the vibrant pink that they rising sun was painting the snowy landscape with. It was like nothing I’ve ever seen.

Early morning backcountry skiing near Yama-no-ie Hut (Mt. Okuteine, Hokkaido, Japan)

Early morning backcountry skiing near Yama-no-ie Hut (Mt. Okuteine, Hokkaido, Japan)

Early morning backcountry skiing near Yama-no-ie Hut (Mt. Okuteine, Hokkaido, Japan)

Early morning backcountry skiing near Yama-no-ie Hut (Mt. Okuteine, Hokkaido, Japan)

We were all over the moon.

Early morning backcountry skiing near Yama-no-ie Hut (Mt. Okuteine, Hokkaido, Japan)

We celebrated by skiing back down to the hut on the famed “Utopia Piste” (yutopia gerende). This is a 400m or so long cleared path with a nice gradient, perfect for a few turns in delicious powder.

Early morning backcountry skiing near Yama-no-ie Hut (Mt. Okuteine, Hokkaido, Japan)

After a breakfast of left over hotpot, heated on the roaring coal-powered potbelly stove, we headed out on a route for Mt. Tsuge, suggested first by Mathieu. This peak was more or less at the same altitude as the hut, and the maps suggested that we’d be able to get there with some traversing around the contours of the land. Furthermore, it was in the direction of the carpark, so it was well and truly on the way back down. As it happened, it turned out that the group of OBs were also planning to head up to Mt. Tsuge, so we’d likely see them at the top.

What was clear from the start of our second day, was that it was going to be amazing weather. After having a few recent ski trips with either grey weather or snow, it was very refreshing to have contrast again.

Climbing Mt. Tsuge from Yama-no-ie Hut (Mt. Okuteine, Hokkaido, Japan)

It wasn’t all super easy going, however, and the contours of the land kept us on our toes as Mathieu steered us around bluffs and gullies.

Climbing Mt. Tsuge from Yama-no-ie Hut (Mt. Okuteine, Hokkaido, Japan)

Before long we found ourselves on the main ridge leading to Mt. Tsuge, and taken aback by the amazing view towards Mt. Muine above Jozankei…

Climbing Mt. Tsuge from Yama-no-ie Hut (Mt. Okuteine, Hokkaido, Japan)

And clear crisp blue skies. I really can’t get enough of those craggy trees and their bulbous accumulations of snow.

Climbing Mt. Tsuge from Yama-no-ie Hut (Mt. Okuteine, Hokkaido, Japan)

At the top we posed with the members of the old guard, before hurtling back down towards the direction of the car park.

Climbing Mt. Tsuge from Yama-no-ie Hut (Mt. Okuteine, Hokkaido, Japan)

The idea had been to try to get as far back to the car as possible without having to push too much along the flat forestry road, but in the end we did find ourselves pushing for 20 minutes or so from where we dropped out of the gradient onto the valley floor.

So many thanks to Mathieu, Vincent and Angelo for making it such a memorable trip!

Overnight backcountry ski trip to Ginreiso Hut (Mt. Harukayama, Hokkaido, Japan)

Given it’s close proximity to Sapporo City, I had expected Ginreiso Hut, at the foot of Mt. Haruka, to be bustling for our overnight trip on the 3rd of January. In the end, our group of four were the only ones to make the short 3 hour climb. We had the place to ourselves. (Unless otherwise noted, all photos by Rick Siddle.)

Skinning up Mt. Haruka (Hokkaido, Japan)

Mt. Haruka is a bit of a mainstay for backcountry skiers, especially for those keen for a quick and easy overnighter, in close proximity to Sapporo. The big attraction for me, at least, is the fantastic Ginreiso Hut. This mountain hut, with a permanent caretaker (the ever-so-helpful Mr. Hirata), is owned and operated by the Sapporo campus of Tokai University (call 011-571-5111 to book in advance and confirm whether or not the caretaker will be there; the hut is not available for use when Mr. Hirata is not there). Along with fellow skiers Dirk, Rick, and my partner Haidee we hired a car and headed out there for a first overnight backcountry ski trip for the year.

Skinning up to Ginreiso Hut near Mt. Haruka (Hokkaido, Japan)

Cars can be parked near the gate at one of the trailheads (location here). Keep in mind, however, that this is not an official carparking space; Mr. Hirata at the hut warned us that after heavy snowfall, it is not uncommon to find one’s car half-buried in snow, pushed up against the car by Otaru City snow-clearing crews. Make sure you’ve got a shovel handy.

We arrived at the trailhead at around 9:30am. There were no other cars parked at the gates, so it appeared that we were some of the first to head up for the day. Just as we were setting off, however, a group of five snowmobiles darted ahead of us, leaving us to breathe their fumes for a few minutes. This is one minor drawback of the route up to the Harukayama mountain hut. Snowmobiles also make use of the forestry road route most of the way up to the hut. While this makes for easier skinning and snowshoeing, it can mean for some icy hardpack in the lower reaches.

If you’re like me, however, and prefer getting away from civilization, at least in principle, the summer hiking trail route follows the forestry road just a few meters below the road. This is the route we chose for much of the way up. This route is ideal for skis, but with plenty of traversing, can be hard going on wider snowshoes.

Skinning up to Ginreiso Hut near Mt. Haruka (Hokkaido, Japan)

Skinning up to Ginreiso Hut near Mt. Haruka (Hokkaido, Japan)

We took a quick break at the final large clearing before hitting the main wide ridge to the hut, around two thirds of the way to the hut. By now a moderate snowfall had begun…

Skinning up to Ginreiso Hut near Mt. Haruka (Hokkaido, Japan)

Meaning that the final hour to the hut was in lower visibility conditions.

Skinning up to Ginreiso Hut near Mt. Haruka (Hokkaido, Japan)

Skinning up to Ginreiso Hut near Mt. Haruka (Hokkaido, Japan)

Skinning up to Ginreiso Hut near Mt. Haruka (Hokkaido, Japan)

We arrived at the hut more or less on schedule at just before 1pm. It was great to have arrived, and we were all ready for lunch.

Ginreiso hut in winter near Skinning up Mt. Haruka (Hokkaido, Japan)

Mr. Hirata poked his head out of the door when we arrived, and ushered us in with his usual great fanfare of making sure we were aware of where everything goes. Boots were placed next to the massive wood-burner stove, boot liners and gloves were tossed up onto the wire rack strung above the stove, and money was exchanged for our night in the hut (800yen per person). Mr. Hirata’s close attention to guest’s movements when they arrive, and when they are cooking, and when they are setting up the bunk rooms, can feel a little overbearing at times, but the man had a heart of gold, and he’s just trying to help and keep things running smoothly.

After a leisurely lunch, we headed out again in better weather to the peak of Mt. Haruka. This is a short 30 minute hike from the hut, and allows for mostly untracked skiing back down to the hut. We only did a couple of runs before retiring to the hut for dinner, chats, and bed.

Dinner preparation inside Ginreiso Hut on Skinning up Mt. Haruka (Hokkaido, Japan)

Interior of Ginreiso Hut on Mt. Haruka (Hokkaido, Japan)

The next morning we woke to mostly blue skies. Perfect weather for hiking up to the top of Mt. Haruka again for a few ski runs before having lunch at the hut and skiing back down to the trailhead.

Skinning up Mt. Haruka (Hokkaido, Japan)

Skinning up Mt. Haruka (Hokkaido, Japan)

Location of Ginreiso Hut (43°06’49.2″N 141°06’38.4″E on Google Maps)

Route GPS file

A recent GPS route map that follows approximately the route we followed can be found on Yamareco below, and the GPX file can be downloaded from here: http://14degrees.org/en/wp-content/uploads/2016/01/track-788711.gpx (this GPS track was made by someone else, so I cannot guarantee its accuracy)

Access by public transport

  • By train and taxi: Arguably the most straight forward option is to get a local train to JR Zenibako Station (on the same JR line as Sapporo Station), and catch a taxi from there. It’s only about 2.8km from the station to the trailhead (route map here), so the taxi is cheap. It will be downhill on the return trip, so can be easily walked on the way down.
  • By train and bus: Catch a train to JR Zenibako train station, and catch the Zenibako/Katsuraoka-sen (銭函・桂岡線) bus from the JR Zenibako train station bus stop heading towards the Zenibako Jo-sui-jo bus stop (銭函浄水場). From the Zenibako Josui-jo bus stop it is a 1.3km walk to the trailhead. The timetable for this bus can be seen here: Timetable info. Return bus timetable here.

The Bird Watching Cafe and Tadashi Shimada Nature Photo Gallery (Chitose, Hokkaido, Japan)

Chitose City is seldom thought of as much more than a landing and transit point for travelers visiting Hokkaido, Japan’s northern-most island. But with its abundance of nature and wooded areas, and awesome little cafes like The Bird Watching Cafe, it is a place worth spending a few days in.

The Bird Watching Cafe, Chitose City, Hokkaido, Japan

We’ve been to The Bird Watching Cafe a couple of times before. It’s only 20 minutes bike ride from our place on a cycle path along the Chitose River. This time, armed with my camera and an old 1970′s 200mm zoom lens, I took a few photos of the birds we saw from the cafe’s windows and adjacent hide.

The Bird Watching Cafe, Chitose City, Hokkaido, Japan

The Bird Watching Cafe, Chitose City, Hokkaido, Japan

The Bird Watching Cafe, Chitose City, Hokkaido, Japan

During our visit, and while chowing down on delicious toasted sandwiches, we saw a kakesu (Eurasian jay; Garrulus glandarius)…

The Bird Watching Cafe, Chitose City, Hokkaido, Japan

A few of the ubiquitous hiyodori (Brown eared bulbul; Hypsipetes amaurotis)…

The Bird Watching Cafe, Chitose City, Hokkaido, Japan

The Bird Watching Cafe, Chitose City, Hokkaido, Japan

A tiny yamagara (Varied Tit; Poecile varius)…

The Bird Watching Cafe, Chitose City, Hokkaido, Japan

A gojuugara (Nuthatch; Sitta europaea)…

The Bird Watching Cafe, Chitose City, Hokkaido, Japan

And a grand old akagera woodpecker (Great spotted woodpecker; Dendrocopos major).

The Bird Watching Cafe, Chitose City, Hokkaido, Japan

A rat was also spotted, hauling corn husks into a pile of rocks to make a nest for the winter.

The Bird Watching Cafe, Chitose City, Hokkaido, Japan

The Bird Watching Cafe, Chitose City, Hokkaido, Japan

As always, the food was great, Tadashi Shimada’s new kingfisher photo exhibition was awe inspiring, and the service warm and welcoming.

Check them out on their page on Facebook, and their website here.

Cafe location (map link):

Access by bus:

  • NOTE: The bus routes described below, leaving from JR Chitose Station, actually start from New Chitose Airport. So, you can actually go direct from the airport to the cafe.
  • Option 1 (no walking involved, but less bus times available): Catch the No. 3 bus heading for Lake Shikotsu (支笏湖) from JR Chitose Train Station (bus stop No. 3), and get off at Byouin-mae bus stop (病院前), across the road from a large hospital-looking facility. The bus ride will be about 25 minutes. The Bird Watching Cafe is on the same side of the road as the bus stop, just a few meters further in the direction the bus was traveling. The bus to Lake Shikotsu leaves from JR Chitose Station only four times a day (as of 30th Dec 2015: 8:51am, 11:51am, 14:51pm, 16:41pm). Return buses to JR Chitose Station are at approx. 10:00am, 13:00pm, 16:00pm and 18:00pm (check with cafe staff for exact times).
  • Option 2 (about 1.6km/20 minute walk involved, but more bus times available): Catch the No. 5 bus from JR Chitose Train Station (bus stop No. 3) heading towards Shinsei (新星), and get off at the last bus stop (Shinsei bus stop, 新星). Walk from here for 1.6km to The Bird Watching Cafe in the direction the bus was traveling (route map on Google Maps).

Whiteroom Tours Avalanche Awareness Course (Niseko, Hokkaido, Japan)

Since moving to Hokkaido here in northern Japan, I’ve been getting more and more into enjoying the winter backcountry hills here. So, I finally got around to attending a two-day avalanche awareness course, run by Whiteroom Tours in Niseko. Overall it was an extremely professional, thorough course with an instructor whose experience was second to none. I’d give it a solid 8.5/10, highly recommended. With a little more local Hokkaido perspective in the course, and better pre-course information, I’d give it full marks.

Whiteroom Tours Avalanche Awareness Course in Niseko, Hokkaido, Japan

I’d never really been into skiing. Mostly that’s because of the cost of lift tickets and the hassle of getting to and from a ski area. In Hokkaido, that has all changed. Within about half an hour’s drive, I can be at a trailhead with my skis, ready to hike up through beautiful winter forests. Hike up in showshoes with skis strapped to a backpack (I really need to get some alpine touring skis and skins), and then enjoy the ski down.

An example of a really mellow trip is Mt. Haruka on the outskirts of Sapporo. We went there a few years ago for an overnighter.

With the majority of the low-lying hills in the Sapporo region, such as Mt. Haruka, it is easy to be complacent about avalanche risks. Much of the time the hike up is among trees, and not all that much time is spent above the treeline. We always head out with the gear necessary to spend a night out if needed, but the whole world of avalanche safety was an unknown to me.

So I made it a goal this season to do a basic avalanche awareness course. A Google search in English for basic two-day hands-on courses in Hokkaido will bring up a few results, including ones run by Black Diamond Tours, Hokkaido Powder Guides, and Whiteroom Tours, among others. Generally, they will be Avalanche Canada accredited courses, with the exception being the Whiteroom Tours course, which is accredited by the New Zealand Mountain Safety Council. What this means is that they all have a standardized curriculum covering the essentials.

Whether run in English or Japanese (e.g., http://h-nadare.com/), the courses will cost between 18,000yen and 30,000yen, depending on the course and date. My friend Dirk and I managed to get onto one of Whiteroom Tours’ early season courses for 18,000yen. The early-season discounted courses seem to sell out quickly, so get in early if you’re interested in taking part. Generally, the course fees only include tuition and materials. Other costs involved include:

  • Transport to and from Niseko
  • Lift passes (and/or ski rental)
  • Accommodation
  • Meals
  • Any ski or backcountry safety gear you need to rent

Dirk and I were told by Whiteroom Tours that we’d need ski equipment and clothing for spending time outside in the snow, as well as a shovel, probe, and avalanche beacon. What we didn’t know, however, was that travel on the lifts up the mountain is not included in the course fees. Furthermore, it was not entirely clear how many lifts we’d end up taking on the mountain. If we’d known this in advance, we could have bought just enough lift credit for the required lifts, rather than having to fork out 4,000yen for a 5-hour pass each day that we’d only end up using for two lift rides.

To their credit, I can understand how early season logistics could be difficult – lifts are not guaranteed to be open from one day to the next. Also, Whiteroom Tours usually deals mostly with visitors already in Niseko for skiing, so participants probably usually either have week passes or staff passes; apparently Dirk and I were some of the first participants on their course who were long-term residents of Hokkaido (i.e., we were not in Niseko primarily for skiing). Either way, however, 1) letting course participants know before hand that lift passes were not included would have avoided the surprise, and 2) a phone call to the lifts in the morning would give course organizers an indication of what areas would be accessible for training, and what non-lift pass holders would have to purchase in terms of lift passes.

In any case, we arrived in Niseko half a day early, in order to get an afternoon of skiing in before the course the next day. It was fairly early in the season, so the snow was not the greatest, but the weather was the clearest I’ve seen it in Niseko. Magical.

Whiteroom Tours Avalanche Awareness Course in Niseko, Hokkaido, Japan

Whiteroom Tours Avalanche Awareness Course in Niseko, Hokkaido, Japan

The course started the next day at 9am, with introductions and half a day of theory. The instructor was Ronan Maguire, a 10-year veteran ski-patroller, avalanche technician at Mt. Hutt ski area in New Zealand, and backcountry forecaster for the New Zealand Mountain Safety Council. It was immediately clear that he knew his stuff and was comfortable in his teaching and facilitating role. It turned out that this Whiteroom Tours avalanche course is the only one outside of New Zealand to be accredited by the New Zealand Mountain Safety Council.

The other participants in the course (6 of us in total) were a mix of ski instructors and ski field operations staff. I was definitely the least experienced skier in the group!

Whiteroom Tours Avalanche Awareness Course in Niseko, Hokkaido, Japan

In the second half of the first day, Ronan took us through how to plan safe routes across terrain and check slopes for stability with compression tests.

Whiteroom Tours Avalanche Awareness Course in Niseko, Hokkaido, Japan

Whiteroom Tours Avalanche Awareness Course in Niseko, Hokkaido, Japan

The second day was another full day outside on the snow. The morning consisted of basic avalanche beacon use and search…

Whiteroom Tours Avalanche Awareness Course in Niseko, Hokkaido, Japan

Followed by an afternoon of on-the-mountain skills for avalanche rescue.

Whiteroom Tours Avalanche Awareness Course in Niseko, Hokkaido, Japan

Whiteroom Tours Avalanche Awareness Course in Niseko, Hokkaido, Japan

All in all, for a two-day course, I was very satisfied. It was awesome to be taught by someone with so much knowledge and experience in the field. Ronan has a great teaching style, allowing students to learn by doing and making mistakes, reflecting on the process as they progress. The only weakness of the course, from a resident-of-Hokkaido perspective, was the relative lack of local knowledge. This was Ronan’s first season in Niseko, and while his expertise and knowledge was clearly transferable, it would have been nice to have had some insight into the specific conditions characteristic of hills in Hokkaido. Between us, Dirk and I had spent more time in the Hokkaido backcountry than anyone else on the course (which is not saying much).

This point notwithstanding, I feel like I can look at the hills in a different way now, more aware of the mechanics behind snow loading and terrain, and what to watch for as I move about in the hills. As for any Hokkaido residents considering this course for the 2016/2017 season (or Spring 2016), this should, by then, be a stellar course with a mix of Ronan’s expert crafting of the course, and a deeper foundation in experience of the Hokkaido conditions.

Whiteroom Tours Avalanche Awareness Course in Niseko, Hokkaido, Japan

November snowshoe trip towards Kimobetsu-dake (Nakayama Pass, Hokkaido, Japan)

“It feels like the depth of winter in January!” Rick exclaimed as we set off into the hills, wading through deep, soft snow. Rick had suggested this trip, leaving from the Nakayama Pass rest area 2 hours southwest of Sapporo City, in order to see what the early winter conditions were like this year in the hills. In short, they were well and truly winter-like conditions.

Group of four showshoeing towards Kimobetsu-dake in November (Nakayama Pass, Hokkaido, Japan)

Dirk, the German, second from the left in the photo above, greeted me earlier that morning at Sapporo Station with a laugh. “Why didn’t you bring your skis? You’ll regret it later!” I wasn’t 100% convinced, as Rick, the Brit, first on the left in the photo above, had mentioned that he wasn’t sure there’d be enough snow to cover the ubiquitous sasa bamboo in the hills. Dirk brought his skis anyway. “Surely with all this snow in the city, the hills will be perfect!”

Jeff, the Alaskan, third from the left in the photo above, arrived in his four-wheel drive station wagon just after 7am to pick us up. Unfazed as ever of the below-freezing morning temperatures, he hopped out of his car in sandals and a t-shirt, and helped us get our gear into the car. Soon after picking Rick up from his place, we were out of the city and heading towards Nakayma Pass.

Snowshoeing near Nakayama Pass (Nakayama-toge) in November (Hokkaido, Japan)

While the weather in Sapporo was clear, it quickly became obvious that we’d not be enjoying clear skies in the hills. We arrived at the top of the 835m high Nakayama Pass in low visibility, a stiff breeze, and well below freezing temperatures. We were all keen to get out of the exposed car parking area and into the relative shelter of the forest.

Snowshoeing near Nakayama Pass (Nakayama-toge) in November (Hokkaido, Japan)

 The rough plan was to scout out a winter route from Nakayama Pass up to Mt. Kimobetsu-dake. Rick, a keen man of the outdoors, noted that there was a summer route from the pass, but it wasn’t marked on any winter backcountry guides. The entire route would be on a very mellow wide ridge, so it should be straight forward, he said.

The first section of the route followed a dirt road up to a radio tower, so it was easy going. Almost too easy going for my liking. At times like this I just want some music in my ears and to get into a rhythm. The great excitement of this section for me, however, was that my camera, an Olympus OM-D E-M1, stopped taking pictures. I resigned to not having a camera for the trip, but soon after, I thought that perhaps the shutter had frozen shut. This was, after all, the first below-freezing trip I had taken the camera on this season, and prior to that it had spent most of the time indoors, where humidity could have built up inside the camera.

Sure enough, when I removed the lens, the shutter was still closed. A light touch was all that was needed to release it, and get it going again. Soon after, the shutter got stuck again, so I gave the camera a tap to release the shutter, and spent the rest of the trip taking photos using the electronic shutter instead (thank goodness for the recent E-M1 firmware update!).

Snowshoeing near Nakayama Pass (Nakayama-toge) in November (Hokkaido, Japan)

 Soon after we finished the 2.5km or so from the pass to the radio towers, Rick took a bearing using a compass and map that would hopefully take us towards Mt. Kimobetsu-dake, roughly following the relatively sasa-clear summer route.

Snowshoeing near Nakayama Pass (Nakayama-toge) in November (Hokkaido, Japan)

 After almost an hour of trudging through deep snow only just deep enough to cover a layer of springy sasa bamboo…

Snowshoeing near Nakayama Pass (Nakayama-toge) in November (Hokkaido, Japan)

we finally found a trailmarker and the going became easier on the sasa clear trail.

Snowshoeing near Nakayama Pass (Nakayama-toge) in November (Hokkaido, Japan)

Snowshoeing near Nakayama Pass (Nakayama-toge) in November (Hokkaido, Japan)

We carried on until just after noon before stopping for lunch. It had been a great morning out in the snow, with plenty of physical exertion to blow the cobwebs out from a week of desk work. Progress, however, had been slow. “We’re about a third of the way from the radio towers to the top of Kimobetsu-dake,” Rick explained. “We started at 835m, we’re now at 960m, and the top is 1175m. At this rate it would be a bit of a push.”

We decided to turn back after lunch, as the days are short at this time of year. By 5pm it is usually dark, even more so on an overcast snowy day.

The going on the way back after lunch was easier. Dirk’s skis and our snowshoes had compacted a nice path to follow. I was, as Dirk had predicted, regretting not having skis. Although, I’ve not yet invested in proper touring skis yet, so the prospect of having to carry my skis on my pack on the way up was not attractive.

Snowshoeing near Nakayama Pass (Nakayama-toge) in November (Hokkaido, Japan)

 By the time we got back to the radio tower access road, Dirk was ready to remove the skins from his skis and slide the rest of the way back down to the car.

Snowshoeing near Nakayama Pass (Nakayama-toge) in November (Hokkaido, Japan)Snowshoeing near Nakayama Pass (Nakayama-toge) in November (Hokkaido, Japan)

We arrived back at the car around 2pm, and already, the light was fading.

Snowshoeing near Nakayama Pass (Nakayama-toge) in November (Hokkaido, Japan)

Snowshoeing near Nakayama Pass (Nakayama-toge) in November (Hokkaido, Japan)

We crammed back into Jeff’s car and headed back down the hill, first stopping at Matsu-no-yu onsen, and then on to “the best ramen place on the Nakayama Pass end of Sapporo” according to Rick and Jeff. With free hard-boiled eggs, and amazing ramen, I would also give the place a 9 out of 10. A little extra legroom at the tables would give it a 10 out of 10.

As always, it was a great day out in the Hokkaido hills.

Snowshoeing near Nakayama Pass (Nakayama-toge) in November (Hokkaido, Japan)

Below is a route map of someone else who did a similar route to us, but made it all the way to the top of Kimobetsu-dake. We made it as far as the swamp area at around 960m. Click here if you cannot see the map below: http://www.yamareco.com/modules/yamareco/showmap.php?did=656019&mode=cyberjapan

University of Oxford fieldwork in Shakotan Village, Hokkaido, Japan

Click here if you can’t see the video embedded above: https://www.youtube.com/watch?v=qLQIYwuyMqo

Two years ago now, I was lucky enough to be able to take part in some University of Oxford fieldwork research here in Hokkaido, northern Japan. On this particular occasion, we were visiting Bikuni Shrine in Shakotan Village, for their annual fire walking festival. We were there to survey participants in the festival before and after the firewalking, to see if taking part in these dangerous rituals have an effect on group cohesion. The research is part of a larger project, called the Collective Rituals and Group Cohesion Project, led by anthropologist Harvey Whitehouse.

Harvey’s PhD student, Chris Kavanagh, was the one leading this particular fieldwork in Shakotan. A group of us from Hokkaido University, assisting in the data collection, would be there for two days, staying at a local inn. And though the footage above that I took makes the work look all rather glamorous, there was in fact a lot of preparation involved, not least of all was getting to Shakotan from Sapporo City.

Shakotan Fire Festival Fieldwork (Hokkaido, Japan)

We rented a car for that purpose, and enjoyed the scenic road around the Shakotan Peninsula. Arriving at the accommodation, it was straight to work, doing last minute preparation of surveys…

Shakotan Fire Festival Fieldwork (Hokkaido, Japan)

And counting out the payment for participation, paid to everyone who would take part in the survey.

Shakotan Fire Festival Fieldwork (Hokkaido, Japan)

We headed over to the shrine, just a short drive away, at dusk, to see if we could collect some responses from locals in the area. While the shrine officials were welcoming (we had contacted them in advance), it felt difficult to approach people out of the blue. A smile and a flash of our official-looking Hokkaido University badges helped put people at ease, however, and we managed to get some good baseline responses.

The main event, however, would be the next evening, so we retired relatively early, in order to get ready for the next day’s festivities. Breakfast the next morning, included in the accommodation package, was incredible. Typical rural Japan coastal meal, it consisted of almost more than we could eat…raw fish, cooked fish, pickled fish…amazing. We were well powered for a long day ahead.

Shakotan Fire Festival Fieldwork (Hokkaido, Japan)

Much of the morning and early afternoon was spent wandering around town, talking to locals, to get a local perspective on what the festival was all about. I walked around some of the local shops and chatted with the shop keepers, the majority of whom have lived in the area all their lives. To most of them, the festival was just part of the yearly happenings, and something that they would take part in if requested by others involved.

Shakotan Fire Festival Fieldwork (Hokkaido, Japan)

As the day wore on, crowds started to gather at the small shrine, and we got into our high gears, approaching young and old to survey about the ritual and how it made them feel.

Shakotan Fire Festival Fieldwork (Hokkaido, Japan)

Soon it was impossible to catch people’s attention, as the festivities were about to start. We stopped approaching people and hunkered down to catch a glimpse at the firewalking.

Shakotan Fire Festival Fieldwork (Hokkaido, Japan)

Shakotan Fire Festival Fieldwork (Hokkaido, Japan)

Shakotan Fire Festival Fieldwork (Hokkaido, Japan)

Shakotan Fire Festival Fieldwork (Hokkaido, Japan)

The firewalking lasted around 30 minutes, after which there was a mass exiting of the onlookers from the shrine area. It was all we could do just to get a dozen or so post-ritual respondents each. Everyone just wanted to get home and celebrate (and not spend 20 minutes responding to a survey with a pen and paper in the dark). On subsequent field trips, we would do away with the pen and paper, and use iPads instead.

All in all, however, for Chris’s first bout of field work in Japan, it went really well. We made a great team. From left: Shuhei, Yo, Chris, Masaki, and me.

Shakotan Fire Festival Fieldwork (Hokkaido, Japan)


Below is mainly timelapse footage from behind the scenes of the field trip (click here if you can’t see the embedded video: https://www.youtube.com/watch?v=dUI_MLPAcC0).

Miami: Capitalism on Steroids

Capitalism on steroids: This is my honest-to-god impression of Miami after visiting that mad place for just under a week for a conference. Luckily, I was able to stay at my friend Markus‘s place. Having lived in Miami for the last 6 years, Markus knew all the best must-see spots, most within cycling distance of his apartment in Coconut Grove (south end of Miami).

Delano Beach Club, South Miami Beach, United States of America

Day One: Tuesday

Markus was kind enough to drive to the airport to pick me up late on Tuesday afternoon. We went straight back to his apartment in Coconut Grove to drop my things off and then head out to dinner at a local Mexican restaurant. As we were about to leave, we heard rain falling outside. “Shall we head out, or wait for the rain to stop?” asked Markus.

“Well, you’re not made of sugar,” I said, and opened the front door. It was immediately clear that sugar or not, I was not going to be going out in that downpour. It had been so long since I had seen such incredible rain. It was as if millions of fire hoses were being directed straight out of the sky towards the earth.

15 minutes later when the rain finally eased up just a little (so much as to only now be a torrential downpour, as opposed to whatever it was previously), we sprinted to his car and headed to the local Mexican place. “The interior is pretty down to earth, but the food is good,” Markus said. And it was good. We had spicy cocoa sauce covered burrito, which tasted much better than it sounds!

Views and vistas in Miami, Dahon folding bike in Miami, United States of America

Views and vistas in Miami, Dahon folding bike in Miami, United States of America

Day Two: Wednesday

After a leisurely morning, Markus loaned me his partner Flavia’s folding bike to head to the conference venue: the Mariott Miami Biscayne Bay Hotel, a brisk 11km from Markus’ place. I packed a spare set of clothes in the pannier Markus loaned me, and set out. I’m glad I did pack those clothes…coming from near-freezing temperatures in Japan to around 30 deg C and very high humidity in Miami was a shock. I arrived at the hotel drenched in sweat. The mighty Dahon folder was up to the task however, and I enjoyed dodging the crazy traffic into the heart of Miami.

Dahon folding bike in Miami, United States of America

I took my time in getting to the conference venue though. I skirted around the Coconut Grove marina…

Views and vistas in Miami, Dahon folding bike in Miami, United States of America

And took a side-route along the very southern-most end of Brickell Ave to check out some Halloween decorations…apparently Madonna lived on this street at one stage…

Halloween decorations in Miami, United States of America

One thing that really struck me cycling through the city, was that the vast majority of people that I overheard speaking were speaking Spanish. You know, you’re sat at the lights, and you overhear a couple of people chatting at the crosswalk. Or you cycle slowly past a group of people outside a cafe. They were all speaking Spanish. I can’t recall hearing anyone speaking English to one another.

This first day of the conference was more about the pre-conference workshops, which I had not signed up for, so I just sat in the conference foyer doing some work. After the pre-conference reception ended, I changed back into my shorts and t-shirt and headed out to meet Markus for a late evening ride around Coconut Grove.

Cruising around Coconut Grove, Miami, United States of America

It was on this ride that for the first time I really saw how much of a paradox Miami is. We would be riding through one block and be surrounded by very low socio-economic-status homes, and the next block would be home to near multi-million dollar homes (complete with privately contracted Miami city police officers driving around in cop cars). “The poorer areas are slowly becoming more gentrified,” Markus explained. Slowly but surely lower SES families are having to move out of the area, with land prices on the rise.

Another thing that struck me was how much Miami reminds me of China. It was difficult to put my finger on it, but I think it has something to do with a general vibe of self-centered pursuit of personal gain? Great swaths of the city being knocked down for new developments…the rich getting richer…

Cruising around Coconut Grove, Miami, United States of America

The contrast was what was most striking. There seemed to be very little in between, at least where we were in Coconut Grove. Either million-dollar homes, or near-poverty.

Day Three: Thursday

I was up early on Thursday to catch the start of the conference, and most of the day consisted of checking out some of the presentation sessions. Most of my research focuses on cultural differences in how people use and behave on social network sites, so I mainly attended sessions that had some social media theme. What struck me was the seemingly firm conviction that for emerging adults (that stage of life between 19 to 28 ish years old), social network sites like Facebook are all about expression of an individualised identity. It’s all about me, me, me. Of course, that may be the case in ‘Western’ countries such as the US and also in New Zealand. But in Japan, social network sites are all about maintaining and nurturing (often strongly obligatory) social ties. It’s all about the expression of a collective identity (in multiple social spheres). What was clear was that the field of the study of emerging adulthood is still in an early stage, and cross-cultural perspectives are sorely needed…

In any case, the day disappeared fast. Markus met me at the hotel, and we cycled over to the Miami art district.

Miami Art District, Miami, United States of America

Markus explained that this area used to be a bit of an eyesore, with bland warehouses covering a huge area of town. Graffiti artists arrived and started transforming the blank canvases into a living artwork.

Miami Art District, Miami, United States of America

Now, there are luxury brands opening up boutique stores in the area, cashing in on the area’s chic vibe. Markus and I opted for a more down to earth spot for dinner, and he introduced me to mangu, a Latin American dish made from mashed plantain. This stuff is good!

Miami Art District, Miami, United States of America

On the bike ride back to Coconut Grove from central Miami, Markus took us on a short detour via the Rickenbacker Causeway. The Miami skyline is amazing from there.

Miami skyline, Miami, United States of America

Day Four: Friday

Today’s highlight was the invited panel discussion that I was part of – Globalization, Media, and Identity in Emerging Adulthood – and that went really well. Beyond that, in the evening I hung out with Markus, Flavia, and Flavia’s friends from Brazil. Some awesome Lebanese food was had for dinner.

Day Five: Saturday

“I know of some derelict missile sites south of Miami,” Markus had said earlier in the week. “Left over from the cold war, they’re perfect for an interesting bike ride. Do you want to check them out on Saturday?”

How could I say no?

The particular site we chose to head to was the Miami Dade AeroJet Rocket Facility, just south of Homestead. So we loaded up the bikes, and drove the 1.5 hours south to get there. Markus’s big bike on the car rack, the Dahon folder in the boot.

Exploring the Miami Dade AeroJet Rocket Facility (near Homestead, United States of America)

On the way we stopped in at a Mexican farmers market. It had a similar vibe to bazaars I’d visited in Central Asia.

Farmers Market near Homestead, United States of America

On offer for food included ghastly sweet polenta cakes and tamarind juice.

Farmers Market near Homestead, United States of America Farmers Market near Homestead, United States of America

The vege market looked well stocked though.

Farmers Market near Homestead, United States of America

After the quick stop we carried on to the rocket site. It appears that it is all rather fuzzy as to whether being at the site is legal or not, so Markus parked a few hundred meters down the main road from the turn off to the site. Signs on the dead straight access way to the site did mention that no unauthorized motorvehicles were allowed, but there was no mention of pedestrian or cyclist access.

Exploring the Miami Dade AeroJet Rocket Facility (near Homestead, United States of America)

Along the way the road was shared by creepies and crawlies, giving the whole place a rather forgotten air about it.

Exploring the Miami Dade AeroJet Rocket Facility (near Homestead, United States of America)

Exploring the Miami Dade AeroJet Rocket Facility (near Homestead, United States of America)

Exploring the Miami Dade AeroJet Rocket Facility (near Homestead, United States of America)

About half way through the exploration, we came across a spot that allowed us a better view over the site. Vertigo was in full swing.

Exploring the Miami Dade AeroJet Rocket Facility (near Homestead, United States of America)

Exploring the Miami Dade AeroJet Rocket Facility (near Homestead, United States of America)

Exploring the Miami Dade AeroJet Rocket Facility (near Homestead, United States of America)

Exploring the Miami Dade AeroJet Rocket Facility (near Homestead, United States of America)

After a solid hour and a half exploring the ruins, we hightailed it back to central Miami, dropping in on Costco on the way (just the same as the Costco we have 30km down the road from my place in Chitose).

The evening was a much more civilized affair. I had mentioned that Thai food was something that is quite hard to find in Japan where I live, so Markus recommended we head to one of the better Thai restaurants in South Miami Beach. Flavia joined us also, which was great, as her chic presence got us into the Delano Beach Club afterwards: one of the more prestigious clubs on  South Miami Beach. This place was amazing. And you’d hope so, considering the US$22 I paid for a gin and tonic (in a thin disposable plastic cup).

Delano Beach Club, South Miami Beach, United States of America

The waitresses were essentially super models (skinny as rakes and all arms and legs), and the club seemed to be working on a business model that relied on the bouncers manning the velvet rope at the entrance of the hotel to let customers in at an attractive-female-to-loaded-looking-male ratio of around 50 to 1. A quick peruse of the Delano Beach Club’s Instragram account corroborates this theory. The place oozed excess, but it was far from tacky. The hotel foyer was art deco exquisite.

Delano Beach Club, South Miami Beach, United States of America

Delano Beach Club, South Miami Beach, United States of America

Many thanks to Flavia for taking us along to see some of the Miami night life.

Day Six: Sunday

If Saturday night was the height of class, then Sunday morning’s visit to Miami airport was a return to reality. Markus very kindly dropped me off at the airport at the ungodly hour of 7am, and I soon found my way onto my All Nippon Airways flight back to Japan via Houston.

Miami Airport, United States of America

In keeping with tradition, I had ordered a different dietary restriction on this flight. This time I had ordered a ‘Muslim meal’. Despite being denied the tub of Haagen-Dazs icecream that everyone else got handed, the meals were great for an economy fare. These ‘Muslim’ curries are always much better than the standard meals.

The Muslim meal on All Nippon Airways from Houston to Narita Tokyo

Bifue Campground at Lake Shikotsu (Hokkaido, Japan)

Bifue Campground is one of the best spots to enjoy the views that Lake Shikotsu has to offer. Situated on the western end of this lake in southern Hokkaido, Japan, the well-appointed campground faces east, allowing expansive views of Mt. Eniwa, Mt. Fuppushi, Mt. Tarumae, and of course the lake itself. Haidee and I headed there by bike recently from Chitose for a quick overnight trip.

Camping at the Bifue Campground on Lake Shikotsu, Hokkaido, Japan

Lake Shikotsu is a favorite for us for an overnighter. It’s only 25km from our house, so it’s an easy 2 hour bike ride on completely separated cycle path the whole way. Usually we’d stay at the Morappu Campground, but this time around, we decided to cycle an extra 18km to the western end of the lake to stay at the Bifue Campground. We’d never stayed there before. With winter fast approaching, this was one of the last weekend’s we’d have to try the campground out.

Cycling from Chitose City to Lake Shikotsu, Hokkaido, Japan

As usual, we followed the Chitose-Lake Shikotsu cycleway (route here). I was on the mighty Tern Verge S27h (renamed for 2016 the Tern Verge Tour), with a full complement of camping gear.

Cycling from Chitose City to Lake Shikotsu, Hokkaido, Japan

At this time of year (early October), the kokuwa (hardy kiwi) wild fruit are ripe for the picking. These mini smooth-skinned kiwifruit are delicious, but are very difficult to access. The vines like very high-up places. As it was, however, the cycleway was covered in them due to recent tail end of a typhoon in the previous few days. The high winds had dropped them all along the path (along with copious amount of branches).

Cycling from Chitose City to Lake Shikotsu, Hokkaido, Japan

We would have spent some more time foraging, but we were a little pressed for time; if we were going to get to the Lake Shikotsu village for lunch, we were going to have to keep moving.

We left home in central Chitose at around 10:00am, and arrived at Lake Shikotsu village at around 12:30pm. We were tempted by the Mizu-no-Uta buffet lunch (which we indulged in for lunch the following day), but opted instead for a quick lunch of udon and snacks.

Cycling from Chitose City to Lake Shikotsu, Hokkaido, Japan

Post-lunch, we started towards Bifue Campground, almost 20km around the lake. Overall, apart from one very short stretch of gravel, the Saturday afternoon ride was below average on the fun and relaxation scale. Regular large trucks thundering past, a headwind breeze, lots of ups and downs, and very few decent views of the lake meant that we were well and truly ready to relax by the lake by the time we made it to the campgound.

Cycling from Chitose City to Lake Shikotsu, Hokkaido, Japan

Access to the campground was down a long driveway, dotted with large puddles from the rain in the preceding days.

Cycling from Chitose City to Lake Shikotsu, Hokkaido, Japan

The hectic approach was made up for, however, by the breathtaking view that awaited us at the campground.

Camping at the Bifue Campground on Lake Shikotsu, Hokkaido, Japan

We spent a few moments scoping the place out before hurrying to set up the tent and get some dinner on the go. Even at the beginning of October in Hokkaido, the temperatures are dropping, and we wanted to get some warm food in us.

Camping at the Bifue Campground on Lake Shikotsu, Hokkaido, Japan

Bifue Campground is also very good in terms of facilities. There are washers and dryers, coin-operated showers, a basic shop, and of course clean ablution blocks and covered outdoor kitchen areas. As of writing (early October 2015), it cost 1,000yen per person per night to stay.

The clear starry night views were more than worth it.

Camping at the Bifue Campground on Lake Shikotsu, Hokkaido, Japan

We had opted to camp on the volcanic-sand beach, which would have been fine, had there not been sporadic squalls roll through during the wee hours of the morning. Gusts of wind and rain meant that at one point we had to hurriedly take down our tarp. Only six of the eight pegs were pegged into hard ground, and the other two had come loose.

The morning broke calm, however, with some amazing golden hour light.

Camping at the Bifue Campground on Lake Shikotsu, Hokkaido, Japan

Camping at the Bifue Campground on Lake Shikotsu, Hokkaido, Japan

Camping at the Bifue Campground on Lake Shikotsu, Hokkaido, Japan

On the menu for breakfast was fresh coffee…

Camping at the Bifue Campground on Lake Shikotsu, Hokkaido, Japan

And croissants, warmed in a pot.

Camping at the Bifue Campground on Lake Shikotsu, Hokkaido, Japan

When the sun peeked out from the clouds, it was quite warm. Otherwise, the temperatures hovered around 5 to 8 degrees C. We weren’t the only ones making the most of the autumn weather, however. At least a couple of sets of people had paddled by while we were having breakfast, either in canoes or kayaks.

Camping at the Bifue Campground on Lake Shikotsu, Hokkaido, Japan

We were packed up and on the road by 9am, and sped back east along the lake towards the Lake Shikotsu village. The headwind we’d had yesterday was now a tailwind, and we made good time. Also being a Sunday, the traffic was less heavy and noisy.

On the Lake Shikotsu Cycle Path near Bifue Campground, Hokkaido, Japan

The big mission for today was to splash out and have a buffet lunch at Mizu-no-Uta hotel. This US$400 plus a night hotel has one of the best value buffet lunches in Hokkaido (we think). For 2,800yen per person, you get access to their amazing buffet lunch plus entry to their hotspring onsen. Both are exceptional. Very well worth a visit every now and then, even more so after a chilly morning camping! Talk about luxury.

Mizu no Uta Onsen, Lake Shikotsu, Hokkaido, Japan

Lunch buffet at Mizu no Uta Onsen, Lake Shikotsu, Hokkaido, Japan

The outdoor pool at the Mizu no Uta Onsen, Lake Shikotsu, Hokkaido, Japan

Inside the onsen at Mizu no Uta Onsen, Lake Shikotsu, Hokkaido, Japan

Refreshed after a leisurely lunch and onsen, all we had to do in the afternoon was roll on downhill back home along the cycle path.

On the Chitose Cycle Path to Lake Shikotsu, Hokkaido, Japan

On the Chitose Cycle Path to Lake Shikotsu, Hokkaido, Japan

On the Chitose Cycle Path to Lake Shikotsu, Hokkaido, Japan

A moving bike selfie on the Chtiose Cycle path to Lake Shikotsu, Hokkaido, Japan

Bifue Campground at Lake Shikotsu. Highly recommended!

A Sapporo bikepacking trip: The Fuchs Loop (Hokkaido, Japan)

“I’ve figured out how we might cycle over those hills,” Dirk said over lunch one day. “A mix of gravel road and singletrack trail through the forest,” he said.

This was music to my ears. Since moving to the Sapporo region five years ago, I’ve eyed up the range of low hills that separate Sapporo City from Jozankei in the west. If only there was a forestry road or hiking trail that would link Jozankei to northern Sapporo, cutting through the dense forest, it would be an off-road cyclist’s dream.

A few weekends later, we were on our bikes to give Dirk’s route a try. From central Sapporo to Jozankei (via Makomanai), then up to Harukayama (via Lake Sapporo), down to Zenibako, and back to central Sapporo. I call it The Fuchs Loop after Dirk’s last name.

We started at 8am from the southern entrance to Hokkaido University, and headed south through the city towards Makomanai. At this time in the morning on a public holiday, we more or less had the roads to ourselves.

Cycling from Sapporo City to Sapporo Kokusai Ski Area in summer (Hokkaido, Japan)

For this trip I was on my Surly Karate Monkey (with Jones Loop bars, if you’re wondering), and Dirk was on his Trek X-Caliber 7. The original plan was to stay a night at the Ginrei-so Hut near the top of Mt. Haruka, hence the extra gear we’re carrying.

We made really good time along the Toyohira River cycle path and then up towards Jozankei Village. Usually this would take close to 3 hours. We knocked off the 30km to Jozankei Village in around 1.5 hours. All the while, feeling pity for the lines of holiday traffic inching their way along the highway.

Cycling from Sapporo City to Sapporo Kokusai Ski Area in summer (Hokkaido, Japan)

We stocked up on food and beer in Jozankei, anticipating a relaxing evening at the hut. The Jozankei hostpring resort area was looking it’s stunning best.

Cycling from Sapporo City to Sapporo Kokusai Ski Area in summer (Hokkaido, Japan)

From Jozankei we cut directly north, towards the artificial Lake Sapporo, and it’s massive dam. This took us through tunnels…

Cycling from Sapporo City to Sapporo Kokusai Ski Area in summer (Hokkaido, Japan)

  Soaring above the valley, plugged up by Jozaneki Dam…  

Cycling from Sapporo City to Sapporo Kokusai Ski Area in summer (Hokkaido, Japan)

And next to the clear blue waters of the lake.

Cycling from Sapporo City to Sapporo Kokusai Ski Area in summer (Hokkaido, Japan)

We were surprised at our own quick pace, arriving at the  gravel-road turnoff to Mt. Haruka-yama at only 11am. So we carried on up the paved road to Sapporo International Ski Field (Sapporo Kokusai), and had our sandwiches for lunch on the lush grass fields.

Cycling from Sapporo City to Sapporo Kokusai Ski Area in summer (Hokkaido, Japan)

Cycling from Sapporo City to Sapporo Kokusai Ski Area in summer (Hokkaido, Japan)

Lunch done, we hurtled back down hill for a few minutes and found our way onto the gravel forestry road that connects with the Haruka-yama Hut (called the Ginrei-so Hut). I was looking forward to seeing the hut in summer, because I had stayed overnight there a few years back on a ski trip (https://www.youtube.com/watch?v=bdScuMG9cDY), and had not been back since.

The route up from the Jozankei side is grin-ear-to-ear gravel road that starts well-kept…

Mountain biking on Mt. Haruka (Harukayama) near Jozankei and Sapporo, Hokkaido, Japan

And slowly deteriorates…

Mountain biking on Mt. Haruka (Harukayama) near Jozankei and Sapporo, Hokkaido, Japan

Until it is more or less a couple of tracks in the grass.

Mountain biking on Mt. Haruka (Harukayama) near Jozankei and Sapporo, Hokkaido, Japan

Mountain biking on Mt. Haruka (Harukayama) near Jozankei and Sapporo, Hokkaido, Japan

“A small slice of that,” laughed Dirk, “and your mind will be somewhere else!” The head of this mushroom was about the size of my palm.

Mountain biking on Mt. Haruka (Harukayama) near Jozankei and Sapporo, Hokkaido, Japan

We arrived at the Ginrei-so hut at around 1:30pm after the short grunt up the gravel road to get there. The hut is owned and managed by Tokai University in Sapporo. If you want to use the facilities there during the day, then this costs a fee of 400yen. To stay the night costs 800yen each. The hut is fairly dingy and dark inside, but it is cosy.

Haruka-yama hut (Ginrei-so), Hokkaido, Japan

In principle, in order to stay there a reservation is needed (call Tokai University on 011-571-5111 during office hours). Our original plan had been to stay the night at the hut on the previous Sunday night, and I had put in a reservation for that night. In the end it was raining on Sunday, so we decided to postpone the trip till Tuesday. The problem was that Monday through Wednesday were public holidays, so there was no way of getting in touch with the university to change our reservation.  

Long story short, we decided to head up on Tuesday without a reservation and hope for the best.  

We were greeted by the chatty Japanese caretaker of the hut, Mr. Hirata-san, who is at the hut year-round. I explained that we had had a reservation for a few nights ago, and he immediately realized who we were. “Ah, Roberto-san, you made it!” I explained that we’d like to stay the night tonight, but he apologized, explaining that today happened to be the day he had to go back down to Sapporo to re-supply. He wouldn’t be at the hut overnight, so we couldn’t stay.  

“Can I offer you some coffee instead,” he offered cheerfully. We gratefully accepted and spent at least 30 minutes on the veranda of the hut chatting with Hirata-san. “Once a bear came up on the veranda…” “the hut is definitely more busy in the winter…” “…it takes up to 6 hours in winter to ski up here, and I do it a couple of times a week to re-supply…my pack weighs 30kg!”  

Mountain biking on Mt. Haruka (Harukayama) near Jozankei and Sapporo, Hokkaido, Japan

It was a pity not to be able to stay, but we knew that from here it was just a quick downhill back to the city. And what a fun downhill it was.

Technical trail for the first 15 minutes or so (which was much steeper than it looks in the photo)…

Harukayama mountain biking, Otaru, Japan

  And then the joy of fast gravel and singletrail…  

Harukayama mountain biking, Otaru, Japan

My slick Schwalbe Big Apple tires were not the best for traction, but they did the job.

After a couple of gates, the trails spat us out into civilization again.

A bike ride from Harukayama to Ishikari Bay, Hokkaido, Japan

  A bike ride from Harukayama to Ishikari Bay, Hokkaido, Japan

With all the extra time we now had we headed to the beach at Ishikari Bay for a post-ride beer before heading back into central Sapporo (we had, after all, lugged those cans over a mountain range). A last hurrah to a great mission accomplished. A highly recommended 90km loop of very mixed terrain.

A bike ride from Harukayama to Ishikari Bay, Hokkaido, Japan

A bike ride from Harukayama to Ishikari Bay, Hokkaido, Japan

A bike ride from Harukayama to Ishikari Bay, Hokkaido, Japan